Building a Patio: 10 Essential Tips You Need in 2024
Transform Your Outdoor Space: The Benefits of Building a Patio
Building a patio is a fantastic way to improve your outdoor space. Whether you’re eyeing a spot for cozy dinners or planning a lively gathering area, this guide will help you get started:
Quick Overview:
- Planning: Sketch your design, choose materials, and decide on location.
- Preparation: Mark out your area and prepare the foundation.
- Building: Lay your chosen materials and finish the edges.
A patio can be the crown jewel of your backyard, serving as the perfect spot for dining, entertaining, or simply relaxing. Not only does it increase your home’s value, but it also provides a practical and versatile outdoor living area. Proper planning is key; you’ll need to determine the size, shape, and materials that best fit your outdoor space and lifestyle.
I’m Steve Sylva, the owner of Steve’s Services Landscape Company. With over 25 years of experience in landscape maintenance and hardscaping, I’ve helped numerous homeowners turn their backyard dreams into reality. Let’s dig into the essentials of planning and building a patio, ensuring you get the professional guidance you need.

Planning Your Patio
Choosing the Right Materials
When building a patio, selecting the right materials is crucial. Different materials offer various aesthetics, durability, and cost implications. Here are some common options:
- Gravel: The least expensive option. It’s easy to install but can be less comfortable for furniture and walking.
- Pavers: Versatile and available in many styles and colors. They are durable and relatively easy to replace if damaged.
- Concrete: Offers a clean, modern look. It’s durable but can crack over time.
- Flagstones: Natural and aesthetic, but the most expensive. They provide a rustic look and are very durable.
Each material has pros and cons, so choose based on your budget, design preference, and how you plan to use the patio.
Designing Your Patio Layout
Location
Choose a location that fits your lifestyle. Close to the house is convenient for dining and entertaining. If you prefer a more secluded spot, consider a corner of the yard.
Size
A 12×12-foot patio can comfortably fit a dining table for four to eight people. If you have the space, larger patios offer more flexibility for additional furniture or features like a fire pit.
Design
Sketch your design on graph paper or use an online floor planning tool. This helps you visualize the layout and ensures you order the right amount of materials.
Dry Run
Before you start laying materials, do a “dry run.” Lay out your pavers or stones to ensure everything fits. This step helps you spot any issues before you start the actual installation.
Graph Paper and Online Tools
Using graph paper or online tools can simplify your planning process. These tools help you create a to-scale design, making it easier to visualize your patio and calculate the materials needed.
Top Tip: Most home improvement retailers offer online calculators to help you determine how much material to order. Just input your patio dimensions, and you’ll get a recommended amount.
By carefully planning your patio’s location, size, and materials, you set the stage for a successful project. With the right tools and a clear design, you’ll be well on your way to creating an outdoor space that meets your needs and improves your home’s value.
Next, we’ll dive into preparing the site for your patio.
Preparing the Site
Excavating the Area
Before you can start building your patio, you need to prepare the site properly. This involves excavation, leveling, and ensuring proper drainage.
Removing Sod
First, mark out the area where your patio will go using stakes and builder’s string. Then, remove the sod and any plants in the area. Use a sharp garden spade to cut through the grass and soil. Make sure to dig out the entire area to a depth of about 8 inches, plus the thickness of your pavers or stones. This will give you a solid base to work with.
Digging Depth and Slope
The depth of your excavation depends on the materials you plan to use. Generally, you should dig down to a depth that is about 3-4 times the thickness of your pavers. If your pavers are 3 inches thick, dig down 9-12 inches.
It’s also important to create a slight slope away from your home to facilitate water drainage. A good rule of thumb is a 1-inch drop for every 4 feet of patio.
Installing the Base
With the area excavated, it’s time to build a strong base for your patio. This involves laying down landscape fabric, adding a gravel or limestone paver base, and compacting it all to create a stable foundation.
Landscape Fabric
Start by laying down landscape fabric to cover the entire excavated area. This helps prevent weeds from growing between your pavers. Cut the fabric to fit the space, making sure it extends slightly up the sides of the excavation.
Adding Gravel or Limestone Paver Base
Next, add a 6-inch layer of gravel or limestone paver base over the landscape fabric. Spread it out evenly using a rake. Lightly wet the gravel with a garden hose to keep down dust and make compacting easier.
Compacting the Base
Use a tamper tool or a rented plate compactor to compact the gravel or limestone base. This step is crucial for creating a stable foundation. Compact the base in layers, making sure each layer is firm before adding the next.
Leveling and Slope Check
After compacting, check the level of the base. Use a level to ensure the base slopes away from your home. This slope ensures that water drains away from your patio, preventing pooling and potential damage.
Screeding the Sand
Finally, add a 1-inch layer of coarse sand on top of the compacted base. Use two parallel PVC pipes as guides and a 2×4 board to screed (or level) the sand. This creates a smooth, even surface for laying your pavers.
By carefully excavating the area and installing a solid base, you set the foundation for a long-lasting patio. Next, we’ll cover the steps for laying the pavers and filling the gaps to complete your patio project.
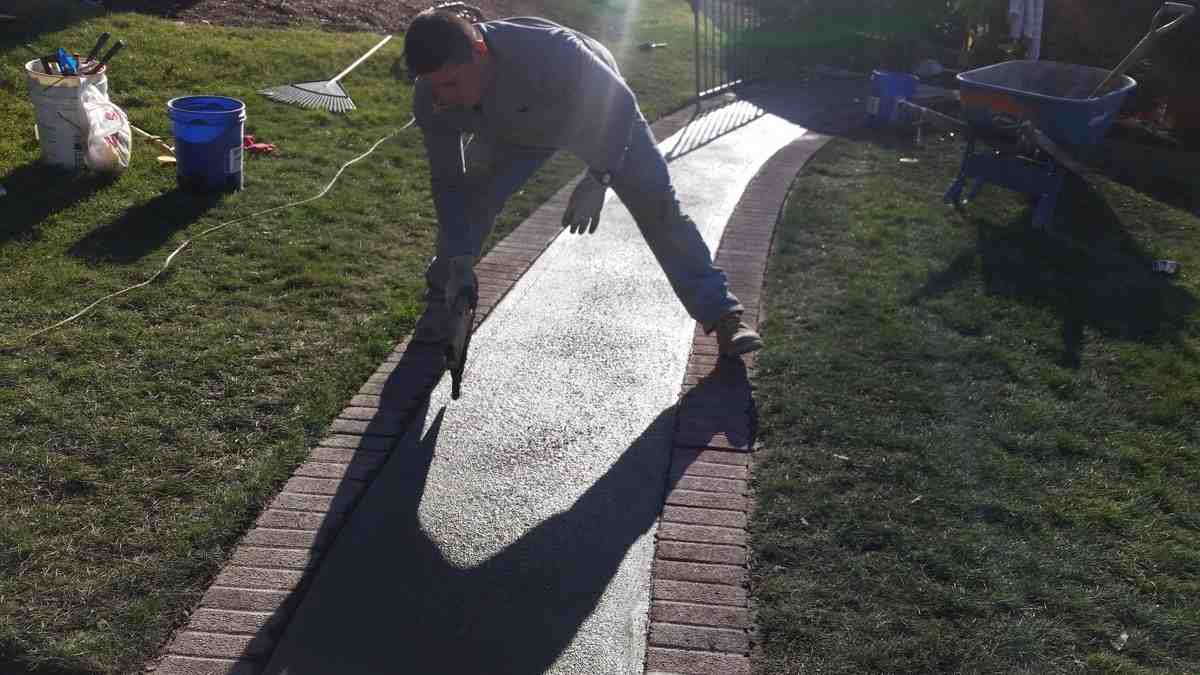
Building a Patio
Laying the Pavers
Once your site is prepared with a solid base, it’s time to start laying the pavers. This process requires precision and attention to detail to ensure a smooth, level surface.
Starting Point
Begin at one corner of your patio area. It’s often best to start at the far end and work your way towards the house or another fixed point. This helps ensure that any necessary cuts or adjustments are made at the edges, where they are less noticeable.
Pattern
Decide on the pattern you want to use. Common patterns include running bond, herringbone, and basket weave. Each pattern offers a different look and complexity level. Dry lay a few pavers to visualize how your chosen pattern will look and fit.
Leveling
Place the first paver on the prepared sand bed. Use a rubber mallet to gently tap it into place, ensuring it is level. Continue laying pavers, one by one, following your chosen pattern. Use a level frequently to check that each paver is even with the others. If a paver is too high or low, adjust the sand underneath to achieve a level surface.
Top Tip: To maintain straight lines, use a string line as a guide. This helps keep your rows aligned as you progress.
Filling the Gaps
After all the pavers are laid, the next step is to fill the gaps between them with polymeric sand. This special sand hardens when it gets wet, helping to lock the pavers in place and prevent weed growth.
Sweeping
Spread the polymeric sand over the surface of the pavers. Use a stiff broom to sweep the sand into the gaps between the pavers. Make sure the sand fills all the joints completely. Sweep off any excess sand from the surface to avoid staining.
Watering
Lightly mist the entire patio with water using a garden hose. This activates the polymer in the sand, causing it to harden. Be careful not to overwater, as this can wash away the sand. Allow the sand to dry and set according to the manufacturer’s instructions, usually about 24 hours.
Final Compaction
Once the sand has set, run a plate compactor over the patio one final time. This ensures the sand is firmly packed into the joints and the pavers are securely in place.

By following these steps for laying pavers and filling the gaps, you can create a beautiful, durable patio that improves your outdoor space. Next, we’ll explore the cost considerations for building your patio, including materials and labor.
Cost Considerations
When building a patio, understanding the costs involved is crucial. Let’s break down the expenses associated with materials and labor, and compare DIY vs. hiring a professional.
Material Costs
The cost of materials can vary significantly based on your choices. Here are some common materials and their average costs per square foot:
| Material | Cost Estimate (per sq. ft.) |
|---|---|
| Gravel | $1.50 – $4 |
| Concrete | $4 – $8 |
| Flagstone | $11 – $30 |
| Brick Pavers | $0.50 – $10 |
| Other Pavers | $0.50 – $10 |
Gravel is the most budget-friendly option, while flagstone tends to be the most expensive. Your choice will depend on your budget and the aesthetic you want for your patio.
Labor Costs
Labor costs can vary based on location and the complexity of the project. Here are some average professional rates for patio installation:
- Professional Rates: Labor costs typically range from $30 to $100 per hour. For a standard ground patio, the total labor cost can be between $1,500 and $5,400.
- DIY Savings: If you decide to go the DIY route, you can save significantly on labor costs. However, keep in mind the time and effort required. For example, digging and preparing the site yourself can save money but will require a lot of physical labor.
DIY vs. Professional
DIY Advantages:
- Cost Savings: By doing it yourself, you can save on labor costs, which can be substantial.
- Personal Satisfaction: Completing a patio project on your own can be very rewarding.
DIY Disadvantages:
- Time-Consuming: Building a patio is labor-intensive and can take several days or even weeks.
- Skill Level: Mistakes can be costly and time-consuming to fix. Professional installers have the experience to avoid common pitfalls.
Professional Advantages:
- Expertise: Professionals have the skills and tools to complete the job efficiently and correctly.
- Time-Saving: Hiring a professional can significantly reduce the project timeline.
Professional Disadvantages:
- Higher Cost: Hiring a professional is more expensive due to labor costs, but the investment can be worth it for a high-quality result.
By considering these factors, you can make an informed decision on whether to go DIY or hire a professional for your patio project. Next, we’ll explore some frequently asked questions about building a patio to help you get started.
Frequently Asked Questions about Building a Patio
What is the least expensive way to build a patio?
The least expensive way to build a patio is by using gravel. Gravel is not only affordable but also easy to install. Here’s why:
- Cost: Gravel costs between $1.50 to $4 per square foot, making it the most budget-friendly option.
- Installation Time: It requires less preparation and labor compared to other materials. You can complete a gravel patio in a weekend.
- Materials: You mainly need gravel, landscape fabric, and edging materials.
How to lay a patio for beginners?
Laying a patio might seem daunting, but with the right steps, beginners can achieve great results. Here’s a simple step-by-step guide:
- Plan Your Patio: Use graph paper or an online tool to design your layout. Determine the dimensions and calculate the materials needed.
- Gather Your Tools and Materials:
- Tools: Shovel, rake, tamper, level, wheelbarrow.
- Materials: Pavers, gravel, sand, landscape fabric.
- Excavate the Area: Remove sod and dig to a depth of about 5 inches.
- Prepare the Base: Lay landscape fabric and add a 4-inch layer of gravel. Compact it well.
- Lay the Pavers: Start from one corner, placing each paver on a bed of sand. Use a level to ensure they are even.
- Fill the Gaps: Spread polymeric sand over the pavers and sweep it into the joints. Lightly water the area to set the sand.
Is it cheaper to build a patio with pavers or concrete?
When deciding between pavers and concrete, cost is a significant factor. Here’s a comparison:
Pavers:
- Cost: Pavers range from $0.50 to $10 per square foot.
- Pros: Easy to replace individual pieces, variety of designs, and DIY-friendly.
- Cons: Can be more expensive overall, especially for intricate designs.
Concrete:
- Cost: Concrete costs between $4 to $8 per square foot.
- Pros: Generally cheaper than pavers for large areas, durable, and smooth finish.
- Cons: Cracks can be difficult to repair, less design flexibility.
Conclusion: If you’re on a tight budget and prefer a simple installation, gravel is the way to go. For a balance between cost and aesthetics, pavers offer flexibility and a range of design options. Concrete can be cost-effective for large, simple patios but may require professional installation to avoid future issues.
By understanding these basics, you can make an informed decision and start building a patio that suits your needs and budget. Next, let’s dive into the common questions we receive about patio projects.
Conclusion
In summary, building a patio can transform your outdoor space into a functional and inviting area for relaxation and entertainment. By carefully planning your patio’s location, size, and design, and by choosing the right materials, you can ensure a successful project. Whether you opt for gravel, pavers, or concrete, each material has its own set of benefits and cost considerations. Proper site preparation, including excavation and base installation, is crucial for a durable and long-lasting patio.
For those who prefer a professional touch, Steve’s Services Landscape Company offers expert patio design and construction services. With over 20 years of experience, our team is dedicated to creating beautiful and functional outdoor spaces custom to your needs. From initial planning to the final touches, we ensure your patio project is completed on time and within budget.
If you’re ready to start your patio project or need more information, contact Steve’s Services Landscape Company today. Let us help you bring your outdoor vision to life and create a stunning patio that you can enjoy for years to come.
Contact Information
Steve’s Services Landscape Company
Everett, MA
Phone: (555) 123-4567
Email: info@stevesservicesllc.com
Website: https://stevesservicesllc.com/patios-decks/
By understanding the essentials of building a patio, you can make informed decisions and achieve the outdoor space of your dreams. Thank you for choosing Steve’s Services Landscape Company as your trusted partner in creating beautiful and functional patios.
