Installing New Sod Lawn: 7 Powerful Tips for 2024
Instant Lawn Transformation: The Power of Sod Installation
Installing new sod lawn is an excellent way to completely transform your outdoor space quickly. Whether you’re dealing with a barren yard, repairing patchy grass, or simply want a lush, green lawn without the wait, sod is your answer.
For a quick overview of how to achieve this transformation:
1. Evaluate and prepare your yard:
– Remove old grass and debris
– Test and amend your soil
2. Choose and order your sod:
– Select the right type for your climate
– Schedule timely delivery
3. Install the new sod:
– Lay it methodically to avoid gaps
– Water immediately and regularly
4. Maintain your new lawn:
– Follow a proper watering schedule
– Wait to mow until the lawn is established
I’m Steve Sylva, with over 25 years of experience in installing new sod lawn and landscape maintenance at Steve’s Services. Let’s dive into how you can create that perfect green space.

Preparing Your Yard for Sod Installation
Before diving into installing new sod lawn, proper preparation of your yard is crucial. This ensures that the sod will establish roots quickly and thrive. Let’s break it down into three key steps: soil testing and amendments, removing existing grass and weeds, and leveling and grading the soil.
Soil Testing and Amendments
1. Soil Testing:
Start by testing your soil. You can purchase a soil test kit online or send a sample to a lab. This will help you understand your soil’s pH and nutrient levels. For optimal sod growth, your soil’s pH should be between 6 and 7.5.
2. Amendments:
– Adjust pH: If your soil test indicates that the pH is too low (acidic), add lime to raise it. If it’s too high (alkaline), use sulfur products to lower it.
– Nutrient Levels: Add organic matter, like compost, to improve soil structure and fertility. This will help your new sod take root and grow strong.
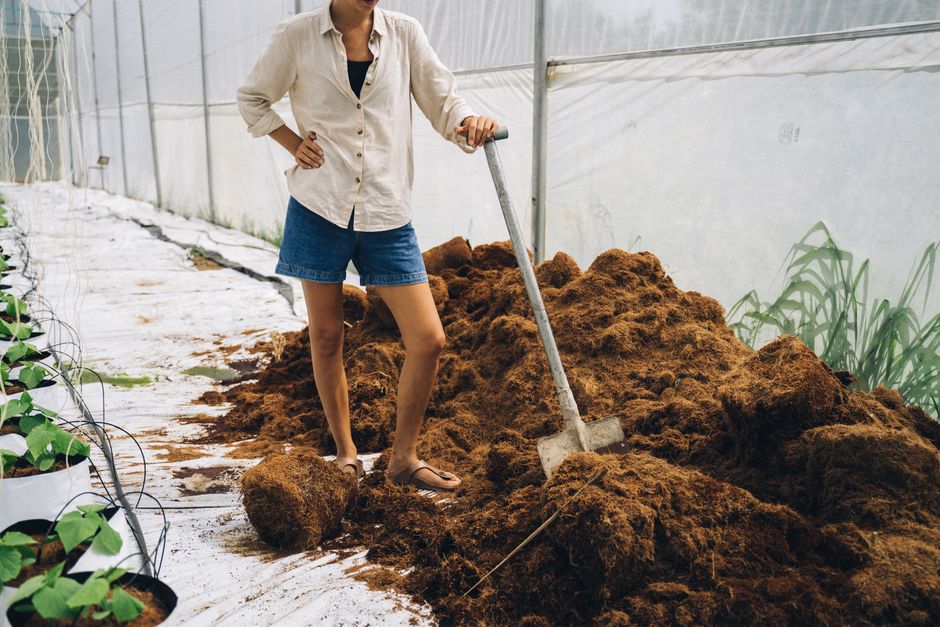
Removing Existing Grass and Weeds
1. Manual Removal:
To prepare the area, you need to remove existing grass and weeds. Use a sod cutter or shovel to dig up the old grass. While herbicides might seem like an easy solution, they can leave residues that harm your new sod. It’s best to avoid them.
2. Debris Cleanup:
Clear away any fallen branches, rocks, or other debris. This ensures a smooth surface for your sod.
Leveling and Grading the Soil
1. Tilling the Soil:
Use a rototiller to break up compacted soil to a depth of about 6 inches. This will help the new sod’s roots penetrate deeper into the soil.
2. Adding Compost and Starter Fertilizer:
Mix in compost with the tilled soil to enhance its organic matter. Apply a starter fertilizer to give your new sod the nutrients it needs right from the start.
3. Leveling the Soil:
– Tools: Use a garden rake and a leveling tool to smooth out the soil. Make sure there are no hills or low spots, as these can cause issues with mowing and drainage.
– Proper Drainage: Ensure that your yard has a gentle slope away from buildings to prevent water from pooling around foundations.
4. Soil Depth:
Check the depth of your topsoil. Ideally, you should have at least 4-6 inches of loamy topsoil. If it’s less, consider adding more topsoil to reach this depth.
By carefully preparing your yard, you’ll set the stage for a lush, healthy lawn. Next, we’ll dive into choosing and ordering your sod to ensure you get the best match for your climate and yard conditions.
Choosing and Ordering Your Sod
Choosing and ordering the right sod is crucial for a beautiful, long-lasting lawn. Let’s break down the steps to make sure you get it right.
Selecting the Right Sod for Your Climate
Cool-Season vs. Warm-Season Grasses:
Your location determines whether you need cool-season or warm-season grasses. Cool-season grasses like Kentucky bluegrass and fine fescue thrive in cooler temperatures. Warm-season grasses like Bermudagrass and Zoysia prefer warmer climates.
Sun Exposure:
Evaluate how much sunlight your yard gets. Some grasses need full sun, while others can tolerate or even prefer shade. Make sure to choose a grass type that matches your yard’s light conditions.
Maintenance Requirements:
Consider how much time you can devote to lawn care. Some grasses need frequent mowing and fertilizing, while others are low-maintenance. Choose a grass type that fits your lifestyle.
Intended Use:
Think about how you plan to use your lawn. High-traffic areas may need more durable grasses, while ornamental lawns can use more delicate varieties.
For tailored recommendations, consult with local nurseries or agricultural extension offices.
Scheduling Sod Delivery
Measuring Your Yard:
First, measure the area where you plan to lay sod. Use a tape measure to get the length and width. Multiply these numbers to get the square footage. For irregular shapes, break them into smaller rectangles or squares and add up the areas.
Calculating Sod Quantity:
Once you have the total square footage, add 5-10% extra to account for cutting and fitting. This ensures you won’t run out of sod during installation.
Delivery Timing:
Fresh sod needs to be laid within 24-48 hours of being cut. Schedule your delivery so that you can start laying the sod immediately. This means having all your prep work done before the sod arrives.
Local Nurseries and Sod Farms:
Order your sod from local nurseries or sod farms. Local suppliers will have grass types suited for your climate. They can also provide fresh sod, which is essential for successful installation.
Timing Considerations
Plan Ahead:
If you have a specific weekend or time frame for your project, schedule your sod delivery in advance. Local suppliers might have a wait time, so planning ensures you get your sod when you need it.
Fresh Sod Logistics:
Coordinate with your supplier to get the sod delivered early in the day. This gives you the whole day to lay it down, reducing the risk of the sod drying out.
By carefully choosing and ordering your sod, you’ll set the foundation for a lush, healthy lawn. Next, we’ll cover the step-by-step process of installing your new sod lawn.
Installing New Sod Lawn
Laying the First Row of Sod
Start by unrolling the first row of sod along a straight edge, like your driveway or patio. This helps keep everything aligned. Use a straight edge to guide your work.
Unroll the sod slowly, smoothing out any bumps or wrinkles as you go. For a neat finish, use a sod cutter to trim any excess sod.
Pro Tip: Stagger the seams like a brick wall. This helps prevent gaps and ensures a tight fit.
Ensuring Proper Contact with Soil
To make sure your sod takes root, it needs to have good contact with the soil underneath. Here’s how to do it:
- Remove Air Pockets: After laying each row, gently pat down the sod with a shovel. This helps remove any air pockets.
- Sod Staples: In areas prone to lifting, use sod staples to secure the sod in place.
- Walk Methodically: Avoid stepping on freshly laid sod. If you must walk on it, use a piece of plywood to distribute your weight evenly.
- Lawn Roller: For large areas, use a lawn roller to press the sod into the soil. Roll one way, then the other, creating a grid pattern. This ensures even contact and removes any remaining air pockets.
Pro Tip: If it rained heavily, skip the roller. The ground will be soft enough to accept the sod without extra pressure.
By following these steps, you’ll ensure that your sod is laid correctly and ready to grow into a lush, green lawn. Next, we’ll cover the essential watering and care tips to keep your new sod healthy.
Watering and Caring for Your New Sod
Initial Watering and Maintenance
Watering your new sod is crucial for its establishment. Right after installing new sod lawn, you need to water it thoroughly. The goal is to keep the sod and the soil beneath it moist but not waterlogged.
First Week: Water your sod 3-4 times daily. Early morning, mid-morning, afternoon, and early evening are the best times. Short, frequent watering sessions prevent the sod from drying out and help the roots start to establish.
Check Soil Moisture: Lift the corners of the sod to check the soil moisture. If the soil is dry, water immediately. A soil probe can also be handy to check moisture levels deeper in the soil.
Avoid Overwatering: Puddles are a sign of overwatering. Too much water can suffocate the roots and cause fungal problems. Aim for moist, not soggy, soil.
Long-Term Sod Care
Once your sod begins to root into the soil, you can adjust your watering schedule.
After Root Establishment: When the sod resists a gentle tug, it’s starting to root. Now, reduce the watering frequency but increase the duration. Water deeply so moisture reaches about 6 inches into the soil. This encourages deeper root growth, making your lawn more drought-resistant.
Watering Frequency: Transition to watering every other day, then gradually to twice per week. Always water early in the day to minimize disease risks.
Deep Watering: Deep watering promotes strong roots. Use a soil probe to ensure water is penetrating deeply. Aim for 6 inches of moist soil.
Early Morning Watering: Watering early helps reduce water loss due to evaporation and keeps the lawn healthier. It also gives the grass time to dry before nightfall, reducing the risk of fungal diseases.
By following these watering and care tips, you’ll help your new sod establish a strong root system and grow into a lush, green lawn. Next, we’ll answer some frequently asked questions about installing new sod lawn.
Frequently Asked Questions about Installing New Sod Lawn
What are Common Mistakes in Laying Sod?
Letting Sod Sit Too Long: Fresh sod has a short shelf life — about 48 hours. If you leave it rolled up for too long, it can dry out and die. Plan your delivery so you can start laying the sod immediately.
Overlapping Pieces: When laying sod, avoid overlapping the edges. Overlapping can cause uneven growth and gaps in your lawn. Instead, butt the edges snugly against each other.
Improper Watering: Both too much and too little water can harm your new sod. Initially, water every day to keep the soil moist but not waterlogged. Check soil moisture by gently lifting the corners of the sod.
When is the Best Time to Lay Sod?
Late Summer to Early Fall: This period offers cooler air temperatures and increased rainfall, which are ideal conditions for sod establishment. The warm soil encourages root growth, and the sod has time to establish before winter dormancy.
Late Spring to Early Summer: These months also provide moderate temperatures and adequate rainfall, supporting root development. Be cautious of hot summer days that can stress the new sod.
Regional Considerations: The best time to lay sod can vary based on your local climate. For warmer regions, sod can be installed almost year-round, except during extreme heat or cold.
How Much Does Sod Cost?
Cost Per Square Foot: On average, sod costs between $0.31 to $0.82 per square foot. This can vary based on the type of grass and your location.
Professional Installation: If you choose to hire professionals, expect to pay about $0.86 to $1.75 per square foot for labor and materials. Professional installation ensures proper handling and laying of the sod.
Additional Expenses: Don’t forget to budget for soil preparation, which may include soil testing, tilling, and adding compost or fertilizer. These steps are crucial for the long-term success of your new lawn.
By avoiding common mistakes, choosing the right time to lay sod, and understanding the costs involved, you’ll be well on your way to a beautiful, healthy lawn. Next, we’ll discuss some essential tips for maintaining your new sod.
Conclusion
At Steve’s Services Landscape Company, we pride ourselves on transforming your outdoor spaces with professional sod installation. Our team is dedicated to providing personalized solutions that cater to your specific needs and preferences.
When you choose us, you’re not just getting a new lawn. You’re partnering with experts who are committed to the long-term beauty and health of your outdoor space. We handle everything from soil preparation to the final watering, ensuring every step is executed with precision and care.
Exceptional customer service is at the heart of what we do. We believe in building lasting relationships with our clients, ensuring you’re satisfied not just today, but for years to come. Our experienced team is always here to answer your questions and provide ongoing support.
Ready to transform your yard? Experience the difference with Steve’s Services Landscape Company and enjoy a lush, green lawn that enhances your home’s curb appeal and value. Contact us today to get started!
