New Lawn Installations: Top 7 Powerful Solutions for 2024
Achieving a Perfect Lawn: Your Guide to New Lawn Installations
New Lawn Installations can transform your home’s curb appeal and provide a lush, green space for relaxation and recreation. But choosing the right method is crucial.
For quick answers, here’s a snapshot of options:
- Sod: Instant results, higher cost, less initial maintenance.
- Seed: Inexpensive, customizable, more effort required.
- Hydroseedy: Fast for large areas, professional help needed.
- Artificial Turf: No maintenance, higher installation effort, perfect for drought-prone areas.
A beautiful lawn reflects proper care and maintenance. Whether you’re starting from scratch or revamping an old patch, understanding the process can save time and money.
My name is Steve Sylva, the owner of Steve’s Services Landscape Company. With over 25 years in the industry, I’ve helped countless homeowners get luscious lawns through proper installation and care.

Now, let’s dive into how to prepare your lawn for installation…
Preparing Your Lawn for Installation
Soil Preparation
Proper soil preparation is crucial for new lawn installations. Let’s break it down into simple steps:
- Use Herbicide: Start by killing any existing vegetation. This ensures a clean slate for your new lawn. Apply a non-selective herbicide and wait about two weeks for it to take full effect.
- Topsoil Addition: Add 2 to 5 inches of high-quality topsoil. Topsoil is the uppermost layer of soil and is rich in nutrients. This will help your new grass grow strong roots.
- Grading: Use a landscaping rake to level the soil. Your goal is to have the soil about 2 1/2 inches below the desired final grade. This allows room for your sod or seeds.
- Rake and Remove Debris: Clear out rocks, roots, and other debris. A smooth surface will make it easier for grass to establish.
- Fertilizing: Apply a starter fertilizer. A slow-release fertilizer like an 18-24-12 blend gives your new lawn the nutrients it needs to thrive.
- Soil Testing and Modification: Test the soil’s pH and nutrient levels. You can get a soil test kit from your local garden center. Based on the results, you may need to add lime to make the soil more alkaline or other soil modifiers to balance it.
- Core Aerate and Roto-Till: Aerate the soil to improve air and water flow. Roto-till to a depth of about 6 inches to loosen compacted soil.
- Compost Blend: Mix in a 2-inch layer of compost. This improves soil structure and fertility.
Grading and Raking
Creating a smooth, even surface is vital for a healthy lawn. Here’s how:
- Use a Landscaping Rake: After adding topsoil and compost, use a landscaping rake to level the surface. This helps prevent water pooling, which can harm grass roots.
- Water Roller: Fill a water roller with water and roll it over the soil. This compacts the soil slightly, making it firm but not hard. It also helps identify any low spots that need more soil.
- Final Raking: After rolling, do a final raking to smooth out any remaining uneven areas. The soil should be about a half-inch below the desired final grade.
- Compact Soil: Lightly compact the soil again using the water roller. This ensures good contact between the soil and the sod or seed.
By following these steps, you ensure that your lawn has the best possible start. Proper soil preparation and grading are the foundation of a lush, healthy lawn.
Next, we’ll explore how to choose the right grass for your lawn…
Choosing the Right Grass for Your Lawn
Choosing the right grass for your lawn is crucial. The type of grass you select will determine how well your lawn thrives under different conditions. Let’s dive into the best grass types for various situations and the factors you should consider.
Best Grass Types for Different Conditions
Different grass types perform better under specific conditions. Here are some of the most popular options:
- Bermudagrass: Ideal for warm climates, Bermudagrass is drought-tolerant and can handle heavy traffic. It’s perfect for areas with lots of sun and activity.
- Zoysiagrass: This grass is known for its durability and ability to thrive in various soil types. It can tolerate moderate shade and is also drought-resistant.
- St. Augustine: Best suited for warm, coastal regions, St. Augustine grass can handle both sun and shade. It’s a great option for lawns with varying light conditions.
- Kentucky Bluegrass: Popular in cooler climates, this grass is known for its lush, green appearance. It prefers full sun but can tolerate some shade.
- Tall Fescue: This grass is versatile and can grow in various conditions, including shade. It’s also known for its deep root system, making it drought-tolerant.
- Perennial Ryegrass: Ideal for cooler climates, Perennial Ryegrass germinates quickly and provides a lush, green lawn. It’s best for areas with moderate traffic.
Climate and Soil Considerations
When selecting grass, consider your local climate and soil conditions:
- Climate: Grass types are generally divided into cool-season and warm-season varieties. Cool-season grasses like Kentucky Bluegrass and Tall Fescue thrive in cooler climates, while warm-season grasses like Bermudagrass and St. Augustine do better in warmer areas.
- Sun Exposure: Ensure your chosen grass type matches the sun exposure of your lawn. For example, Bermudagrass loves full sun, while Tall Fescue can tolerate shade.
- Traffic Tolerance: If your lawn will see a lot of foot traffic, choose a durable grass like Bermudagrass or Zoysiagrass.
- Drought Tolerance: In areas with water shortages, drought-tolerant grasses like Bermudagrass and Zoysiagrass are excellent choices.
- Soil pH and Fertility: Test your soil to determine its pH and fertility. Most grasses prefer slightly acidic to neutral pH levels (6.0 to 7.0). Amend your soil as needed to create optimal growing conditions.
By considering these factors, you’ll be well on your way to choosing the perfect grass for your new lawn installation.
Next, we’ll look at the step-by-step process for installing new sod…
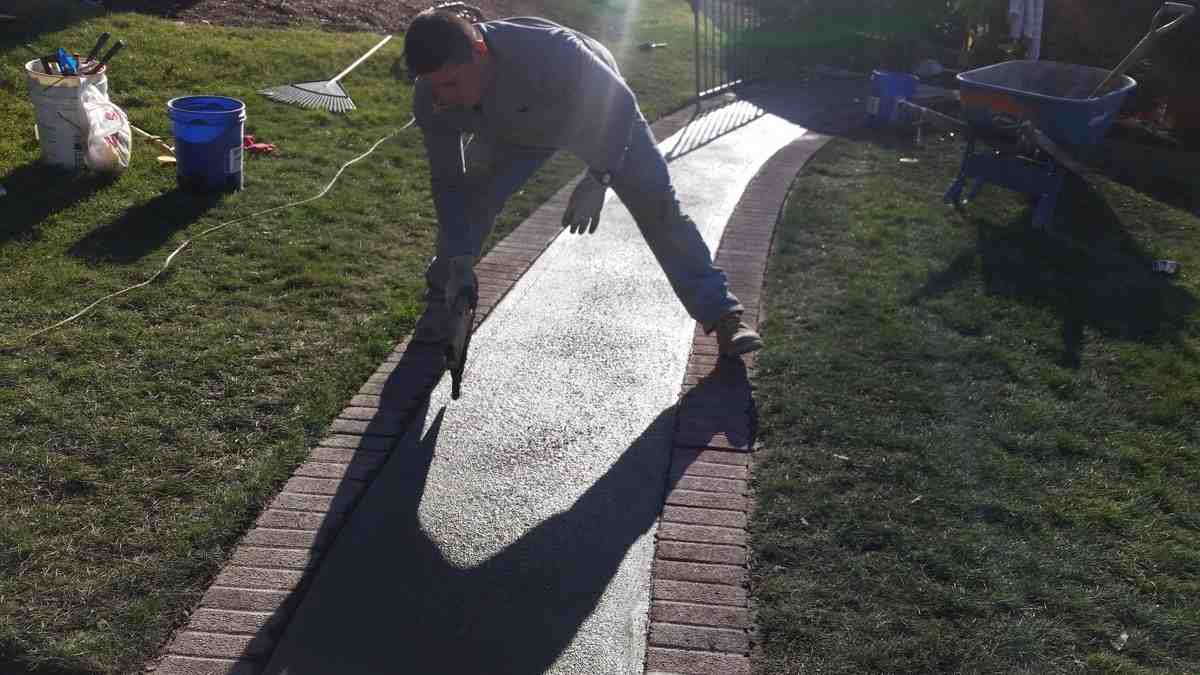
Installing New Sod
Installing new sod is the quickest way to achieve an instant, lush green lawn. This method is ideal for homeowners who want immediate results and are willing to invest a bit more upfront. Below, we’ll walk you through the step-by-step process for sod installation and break down the cost considerations involved.
Step-by-Step Sod Installation Process
- Hand Tilling: Begin by hand tilling the areas to be sodded. This helps remove all previous weeds and grasses, ensuring a clean slate for your new lawn.
- Grading: Once tilled, grade the area to ensure proper drainage. Remove any rocks, roots, or debris to create a smooth surface. This step is crucial for preventing waterlogging and ensuring even growth.
- Starter Fertilizer: Apply a starter fertilizer to the soil. This will provide the essential nutrients needed for the new sod to root quickly and establish itself.
- Installing the Sod: Unroll the sod pieces and fit them together tightly, much like a puzzle. Ensure that the edges are snug to avoid gaps where weeds could grow.
- Rolling: Use a weighted lawn roller to press the sod into the soil. This helps eliminate air pockets and promotes good root-to-soil contact.
- Watering: Water the newly installed sod thoroughly. For the first two weeks, you may need to water up to 20 minutes three times per day, depending on the weather conditions. Adjust as necessary to avoid sogginess.
Cost of Sod Installation
The cost of sod installation can vary based on several factors, including the size of your lawn, the type of sod chosen, and whether you hire professionals or opt for a DIY approach. Here are some key cost considerations:
- Pallet Pricing: Sod is typically sold by the pallet. Each pallet covers about 450 square feet and costs between $0.30 and $0.85 per square foot.
- Installation Fees: Hiring professionals to install sod will increase the overall cost. Professional installation usually ranges from $1 to $2 per square foot, including labor and materials.
- Topsoil Costs: Good-quality topsoil is essential for sod installation. Expect to pay for topsoil if your existing soil is poor. This can add an extra $0.50 to $2 per square foot.
- Additional Costs: Other potential costs include removing old sod, applying herbicides, and installing irrigation systems. These can add to the overall expense but are often necessary for a successful installation.
By understanding these steps and costs, you can make an informed decision about installing new sod for your lawn. Next, we’ll explore the process and benefits of seeding a new lawn…
Seeding a New Lawn
Seeding a new lawn is a cost-effective way to achieve a lush, green yard. It allows you to choose the best grass varieties for your specific conditions and is a great DIY option. Here’s a step-by-step guide to help you get started.
Step-by-Step Seeding Process
1. Ground Preparation
Start by removing any existing vegetation with a sod cutter. If your soil is compacted, core aerate or roto-till the area to a depth of 1-2 inches. This helps loosen the soil and allows for better root growth.
2. Seed Spreading
Choose a grass seed that suits your soil type, sun exposure, and traffic levels. Use a broadcast spreader to evenly distribute the seeds. For large areas, a walk-behind spreader can make the job easier.
3. Starter Fertilizer
Apply a starter fertilizer at a rate of 10 lbs per 1,000 square feet. This supplies essential nutrients to help your new grass grow vigorously.
4. Mulch Application
Cover the seedbed with a thin layer (about 1/8 inch) of grass straw mulch. This helps retain moisture and protects the seeds while allowing sunlight to reach them.
5. Watering
Keep the soil moist at all times during the germination period, which is usually around 3 weeks. Water lightly but frequently until the seedlings are about an inch tall.
Best Seasons for Seeding
Spring
Spring is an excellent time for seeding cool-season grasses like Kentucky Bluegrass and Tall Fescue. Soil temperatures are warming up, and natural rainfall helps keep the soil moist.
Fall
Fall is also ideal for cool-season grasses. The cooler temperatures and increased rainfall create optimal conditions for seed germination. Aim to plant in late August to mid-September for the best results.
Soil Temperatures and Rainfall
For warm-season grasses like Bermuda and Zoysia, late spring to early summer is the best time to seed. Soil temperatures should be around 60°F (15°C) or higher for successful germination.
By following these steps and choosing the right season, you can ensure a successful lawn seeding project. Next, we’ll answer some frequently asked questions about new lawn installations…
Frequently Asked Questions about New Lawn Installations
How do I replace my old lawn with a new one?
Replacing an old lawn involves several steps to ensure that the new grass thrives.
First, you need to kill the existing lawn. This can be done using an herbicide. Make sure to follow the instructions on the product label for the best results.
Next, improve the soil. Remove any debris, rocks, and old turf. You might need to core aerate or roto-till the area to loosen the soil. Adding organic matter or a soil modifier can also help improve soil fertility and structure.
Finally, plant grass plugs or lay new sod. Make sure to water the area thoroughly to help the new grass establish roots.
Can I just throw grass seed down on an existing lawn?
Simply throwing grass seed on an existing lawn is not the best approach. For the best results, you should overseed your lawn. This involves preparing the lawn to receive the new seeds.
Steps include:
- Mow the existing grass as short as possible.
- Rake the lawn to remove debris and thatch.
- Aerate the soil to allow better seed-to-soil contact.
- Spread the grass seed evenly using a broadcast spreader.
- Water the lawn regularly to keep the soil moist until the new grass is established.
This method helps in filling in thinning grass and creating a more competitive lawn that resists weeds.
How do you redo an old lawn?
Redoing an old lawn involves a few key steps:
- Kill weeds: Use a herbicide to eliminate existing weeds and unwanted grass.
- Test the soil: Conduct a soil test to determine pH levels and nutrient deficiencies. This helps in choosing the right amendments to improve soil quality.
- Address grading issues: Ensure the lawn is level to avoid water pooling. You may need to add or remove soil to correct any grading problems.
- Prepare the soil: Roto-till or aerate the soil to loosen it up. Add compost or other organic matter to improve soil fertility.
- Seed or sod: Depending on your choice, either spread grass seed or lay sod.
- Water: Keep the soil consistently moist to help the new grass establish.
By following these steps, you can transform an old, tired lawn into a lush, green space.
Next, we’ll conclude with some final thoughts on maintaining your new lawn…
Conclusion
At Steve’s Services Landscape Company, we understand that a beautiful lawn is more than just grass—it’s an investment in your home’s curb appeal and a space for your family to enjoy. That’s why we offer professional lawn care services custom to your specific needs.
Personalized Solutions
Every lawn is unique, and so are its requirements. Our team of experts will assess your lawn’s specific conditions—soil type, sun exposure, and foot traffic—to develop a customized plan. Whether you’re interested in sod installation for an instant green lawn or prefer the cost-effective approach of seeding, we ensure that every step is executed with precision.
Exceptional Customer Service
We take pride in our work and the satisfaction it brings to our customers. Our commitment to exceptional customer service means we’re with you every step of the way, from the initial consultation to the final mow. We believe in building lasting relationships with our clients, ensuring your lawn remains lush and healthy year after year.
Why Choose Us?
- Expert Knowledge and Experience: Our team has the expertise to handle all aspects of lawn care, from soil testing to selecting the right grass type.
- Customized Lawn Care Programs: We offer custom solutions to meet your lawn’s unique needs.
- Time and Effort Savings: Let us handle the hard work so you can enjoy your beautiful lawn without the hassle.
- Consistent and Reliable Maintenance: We provide regular care to keep your lawn in top condition.
- Improved Curb Appeal: A well-maintained lawn adds value to your property and creates a welcoming atmosphere.
Ready to transform your outdoor space? Contact Steve’s Services Landscape Company today and let us help you create the lawn of your dreams.
For more information on our services, visit our new lawn installation services page.
