How to fertilize new sod: 7 Powerful Tips for Success 2025
Feeding Your Fresh Turf: The Basics of Sod Fertilization
How to fertilize new sod correctly is critical for establishing a healthy, vibrant lawn that will thrive for years to come. If you’re looking for the quick answer:
Quick Guide to Fertilizing New Sod:
1. Wait 30 days after installation before first fertilizer application
2. Use starter fertilizer with balanced NPK (like 16-16-16) or higher phosphorus (like 10-20-10)
3. Apply at rate of 0.5-1 lb nitrogen per 1,000 sq ft
4. Water thoroughly immediately after application
5. Follow up with monthly applications during growing season
Installing new sod is a significant investment in your property’s appearance and value. While that fresh green carpet looks beautiful on day one, the real work of establishing strong roots is just beginning. Proper fertilization provides essential nutrients that help new sod develop deep root systems and resist drought, disease, and traffic damage.
Many homeowners make the mistake of fertilizing too soon or using the wrong formula, which can actually harm delicate new grass. The key is understanding the right timing, products, and application methods for your specific grass type and regional climate.
I’m Steve Sylva, owner of Steve’s Services, and with over 25 years of experience in the landscape industry, I’ve helped countless Massachusetts homeowners learn how to fertilize new sod properly to establish lush, healthy lawns that stand the test of time.
Similar topics to How to fertilize new sod:
– Best fertilizer for new sod
– Caring for new sod
Why Fertilizing New Sod Matters
That beautiful green carpet you just installed isn’t just lounging around looking pretty—it’s fighting for survival! Your new sod has experienced the turf equivalent of major surgery: being cut from its original soil home, transported in a truck, and then placed in a completely new environment. The thin layer of soil attached to the grass blades contains limited nutrients, while the root system is shallow and stressed.
Proper fertilization isn’t just helpful—it’s essential for your lawn’s long-term health and appearance.
“I’ve seen countless homeowners invest thousands in beautiful new sod, only to watch it struggle because they skipped the crucial nutrition step,” explains our head landscaper at Steve’s Services. “Think of fertilizer as recovery medicine for your transplanted grass.”
When you understand how to fertilize new sod correctly, you’re providing four major benefits:
Strong root development is perhaps the most important outcome. The phosphorus in starter fertilizers acts like a root-building supplement, stimulating those tiny white roots to dive deeper into your soil. Scientific research confirms that proper phosphorus levels can increase root mass by up to 30% in the critical first weeks.
Stress resistance comes primarily from potassium, which functions as your grass’s shield against drought, disease, and those brutal Massachusetts winter temperatures. Without this protection, your new lawn remains vulnerable during its establishment phase.
Vibrant color and consistent growth result from balanced nitrogen application. This is what gives you that lush, emerald carpet effect that makes neighbors envious.
Natural weed suppression happens when your well-fed grass grows thick and strong, leaving little room or resources for unwanted plants to establish.
Can the Wrong Fertilizer Harm New Sod?
Absolutely—and I’ve seen the heartbreak firsthand.
“Last spring, a client in Arlington was so excited about his new lawn that he applied a heavy dose of high-nitrogen fertilizer the day after installation,” shares one of our turf specialists. “Within 48 hours, the edges were turning crispy brown. That’s salt burn in action.”
The biggest risks of improper fertilization include:
Fertilizer burn occurs when too much fertilizer creates a concentrated salt solution around grass roots. The salt literally draws moisture out of the grass—like grass jerky, but not in a good way. You’ll see yellow or brown patches developing, especially during hot weather when the grass is already stressed.
High-nitrogen products can create an imbalance in your new lawn’s development. While the top may look lush and green temporarily, the roots remain shallow and weak. It’s like building a skyscraper with an inadequate foundation.
Heat stress becomes magnified when you combine hot weather with fertilizer application. The chemical reactions generate additional heat in the soil, potentially cooking delicate new roots.
Cool-Season vs. Warm-Season Needs
Here in Massachusetts, we’re primarily dealing with cool-season grasses like Kentucky bluegrass, perennial ryegrass, and various fescues. These northern champions have different nutritional needs than their southern cousins.
Cool-season grasses (what we plant in Massachusetts) grow most vigorously during spring and fall, when temperatures range between 60-75°F. These grasses naturally slow down during summer heat and may enter a semi-dormant state during extreme heat waves. This means your fertilization schedule should emphasize spring and fall applications, with lighter summer feeding if any.
Warm-season grasses like Bermuda, zoysia, and St. Augustine (rarely used in our region) have almost the opposite schedule. They thrive in summer heat and go dormant (turning brown) during winter. Their fertilization needs peak during late spring through early fall.
The timing difference is crucial. Applying heavy fertilizer to cool-season sod during July heat waves can stress the grass when it’s already struggling, while the same application in September would fuel healthy growth.
“I always tell my Massachusetts clients to think of their lawn’s growth pattern like our Boston traffic,” jokes our turf manager. “It races along in spring and fall but slows to a crawl in summer heat and winter cold. Feed your lawn when it’s ready to move, not when it’s stuck in traffic!”
Understanding this seasonal timing is just as important as knowing how to fertilize new sod with the right products. Your grass can only use nutrients when it’s in an active growth phase, so synchronizing your feeding schedule with natural growth cycles maximizes effectiveness while minimizing waste.
Soil Prep & First 24 Hours Before Laying Sod
The foundation for successful sod establishment begins before the first piece is ever laid. Proper soil preparation is crucial for long-term lawn health and can significantly reduce fertilizer needs down the road.
Soil Testing vs. Guesswork
I can’t tell you how many times I’ve seen homeowners skip soil testing only to struggle with their lawn for years afterward. At Steve’s Services, we always recommend soil testing before installing new sod. It’s a small upfront investment (typically $15-$150 depending on how comprehensive the test is) that can save you hundreds or even thousands in the long run.
| Approach | Benefits | Drawbacks | Cost Range |
|---|---|---|---|
| Soil Testing | Precise nutrient recommendations, pH guidance, identifies deficiencies | Takes time to get results | $15-$150 depending on test comprehensiveness |
| Guesswork | Immediate action, no waiting | May miss critical issues, potential waste of resources | Potentially $100s in wasted products and replacement costs |
“The soil test is like getting a physical before starting a new workout regimen,” explains our soil specialist. “You wouldn’t start training for a marathon without knowing your baseline health, right? The same applies to your soil.”
The ideal pH for most turf grasses sits between 6.0 and 7.0. Once you know your soil’s pH, you can adjust as needed with lime (to raise pH) or sulfur (to lower pH). Beyond pH, your soil might be lacking in essential nutrients that no amount of future fertilization will fully address if the foundation isn’t right.
After testing, focus on improving your soil structure by adding 2-3 inches of quality compost into the top 4-6 inches of soil. This simple step dramatically improves drainage, nutrient retention, and creates a welcoming environment for new roots. Make sure to level the area properly too – those little dips and bumps aren’t just annoying to look at; they create water pooling issues that can lead to disease and root problems.
Before laying sod, pre-water the soil until it’s moist but not soggy. Think of it as creating the perfect welcome environment for your new lawn’s roots to grow into.
Should Fertilizer Go Down Before the Sod?
This question sparks plenty of debate among lawn professionals, but our experience and research point to a clear answer: Yes, applying starter fertilizer to the soil before laying sod provides significant benefits.
“Pre-installation fertilization is like setting the table before your guests arrive,” explains our installation team leader. “You’re putting nutrients exactly where those new, hungry roots will be searching for them.”
For best results before laying sod, we recommend either:
A balanced starter fertilizer (16-16-16) applied at approximately 6.5 lbs per 1,000 sq ft, or
A phosphorus-rich starter (10-20-20) at around 10 lbs per 1,000 sq ft
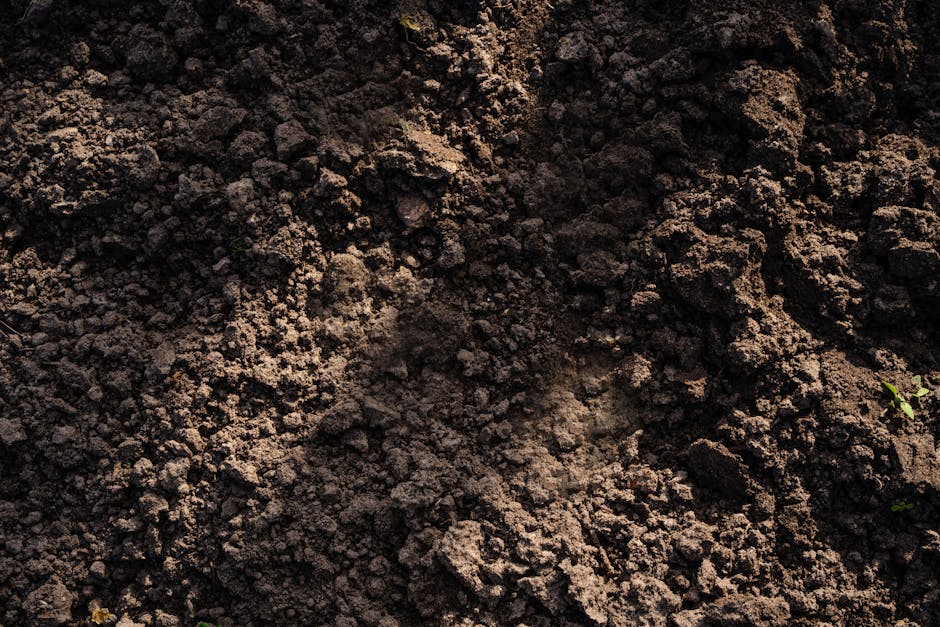
The application method matters just as much as the product. Use a broadcast spreader for even coverage, then lightly rake the fertilizer into the top inch of soil. Water thoroughly to activate the fertilizer, but allow the water to soak in until the ground is moist but not muddy before laying your sod.
One Medford homeowner we worked with last year was initially skeptical about this pre-fertilizing step. “I thought it was just an extra expense,” he told us, “but the difference between my lawn and my neighbor’s—who skipped this step—was noticeable within weeks. My sod rooted faster and looked healthier right from the start.”
This preparation stage sets the stage for successful how to fertilize new sod practices in the weeks that follow. Taking time with soil prep pays dividends in reduced water needs, stronger root development, and fewer pest and disease issues for years to come. For more information about proper fertilization techniques, check out our comprehensive fertilizing guide.
How to Fertilize New Sod: Step-By-Step Game Plan
Now that we understand the importance of fertilization and soil preparation, let’s dive into a detailed plan for how to fertilize new sod throughout its establishment period.
The secret to a lush, healthy lawn isn’t just about slapping down fertilizer whenever you feel like it. Think of your new sod as a baby that needs the right nutrition at exactly the right times. Here’s our proven approach that’s worked wonders for countless Massachusetts homeowners:
How to Fertilize New Sod in Week 1
That first week is make-or-break time for your new green carpet, but here’s a surprise: fertilizer isn’t actually your top priority right now.
“Most folks are itching to feed their new sod immediately,” says our lawn care team leader. “But what your sod really craves in that first week is consistent moisture, not nutrients.”
During this critical first week, your main focus should be watering. Give your sod a nice drink 2-3 times daily for about 15-20 minutes each session. This helps overcome transplant shock and encourages those first tentative roots to explore their new home.
If you didn’t add pre-installation fertilizer (as we discussed earlier), you can apply a very light feeding with a starter fertilizer like 10-20-10. Go with just half the normal rate—about 0.5 lb of nitrogen per 1,000 square feet. And always water immediately after application to wash those nutrients down to root level where they can do their best work.
Meanwhile, keep foot traffic to an absolute minimum. Your sod is still getting comfortable in its new environment!
How to Fertilize New Sod in Weeks 2-4
As your sod settles in, you’ll need to adjust your approach. Think of these weeks as a gradual transition from intensive care to regular maintenance:
During week 2, continue your watering routine, though you might cut back to once or twice daily if temperatures are moderate. This is a good time to play lawn detective—gently lift a corner of sod to check for root development. Those little white tendrils reaching into the soil are exactly what you want to see! Fertilizer can still wait at this stage.
By week 3, you can usually reduce watering to once daily, making sure you’re soaking the soil 3-4 inches deep. If roots are establishing nicely, you can start taking a cautious stroll on your new lawn, but still no need for additional fertilizer.
The 30-day mark is when the magic happens. This is typically the perfect moment for your first post-installation feeding. Your sod has developed enough roots to efficiently use nutrients, and it’s entering a growth phase where it truly benefits from extra nutrition.
Choose a balanced fertilizer (like 16-16-16) or one slightly higher in nitrogen (like 24-4-12) and apply at a rate of 1 lb of nitrogen per 1,000 square feet. For even coverage, use a broadcast spreader and make two passes in perpendicular directions—like mowing north-south, then east-west. Always water thoroughly right after application.
For more detailed guidance about choosing the right product, check out our guide on Sod Fertilizer.
Watering & Fertilizer: Perfect Partnership
Water and fertilizer work hand-in-hand—think of water as the delivery truck that brings nutrients to your grass roots. Get the watering wrong, and even the best fertilizer program falls flat.
Once your sod has settled in (around 3-4 weeks), it’s time to shift to deep, infrequent watering. This encourages those roots to grow downward rather than staying near the surface. Aim for about 1 inch of water weekly, typically delivered in 2-3 deep waterings rather than daily light sprinkles.
Morning irrigation (between 5am and 9am) is ideal. Your grass gets a good drink before the day heats up, and leaves have time to dry, reducing disease risk. Late evening watering often leads to fungal problems—something we see frequently in humid Massachusetts summers.
“The most common question we get is how to translate ‘inches of water’ into actual sprinkler time,” says our irrigation specialist. “While systems vary, most sprinklers deliver roughly 1/4 inch of water per 15 minutes. So for that 1-inch weekly goal, you’d run your sprinklers for about an hour total each week, divided into a few sessions.”
Need help converting inches to minutes for your specific irrigation system? This guide breaks it down beautifully.
Always remember to water immediately after fertilizing. This washes nutrients off grass blades (preventing burn) and delivers them right where they’re needed—at root level. Your lawn will thank you with lush, green growth and the resilience to handle whatever New England weather throws its way.
Aftercare: Transition to a Regular Lawn Program
After the critical establishment period (typically 6-8 weeks), your new sod should be well-rooted and ready to transition to a regular maintenance program. This doesn’t mean your lawn no longer needs attention—rather, it requires a different approach to continue thriving.
For Massachusetts lawns, the seasons dictate your fertilization schedule. In spring (March-May), apply a balanced fertilizer with pre-emergent weed control around Memorial Day. Look for an NPK ratio like 30-0-9 and apply at a rate of 1 lb of nitrogen per 1,000 sq ft. This gives your lawn that initial boost as it wakes up from winter dormancy.
When summer (June-August) rolls around, you’ll want to ease up on the feeding. The heat puts enough stress on your grass without pushing growth through heavy fertilization. If needed, use a light application (half rate) of a fertilizer with slow-release nitrogen. During these warmer months, proper watering becomes your main focus—your grass needs hydration more than it needs food.
“Fall is actually the most important time to fertilize cool-season lawns,” explains our seasonal care specialist. “The nutrients applied then help develop deep root systems that will sustain your lawn through winter and give it a head start in spring.”
In fall (September-November), apply a winterizing fertilizer around Labor Day with an NPK ratio like 24-0-11. Then follow up with a final application around Halloween using the same formula. These fall feedings are crucial for root development and spring green-up. While your grass isn’t growing much above ground during the cooler months, the roots are actively developing below the surface.
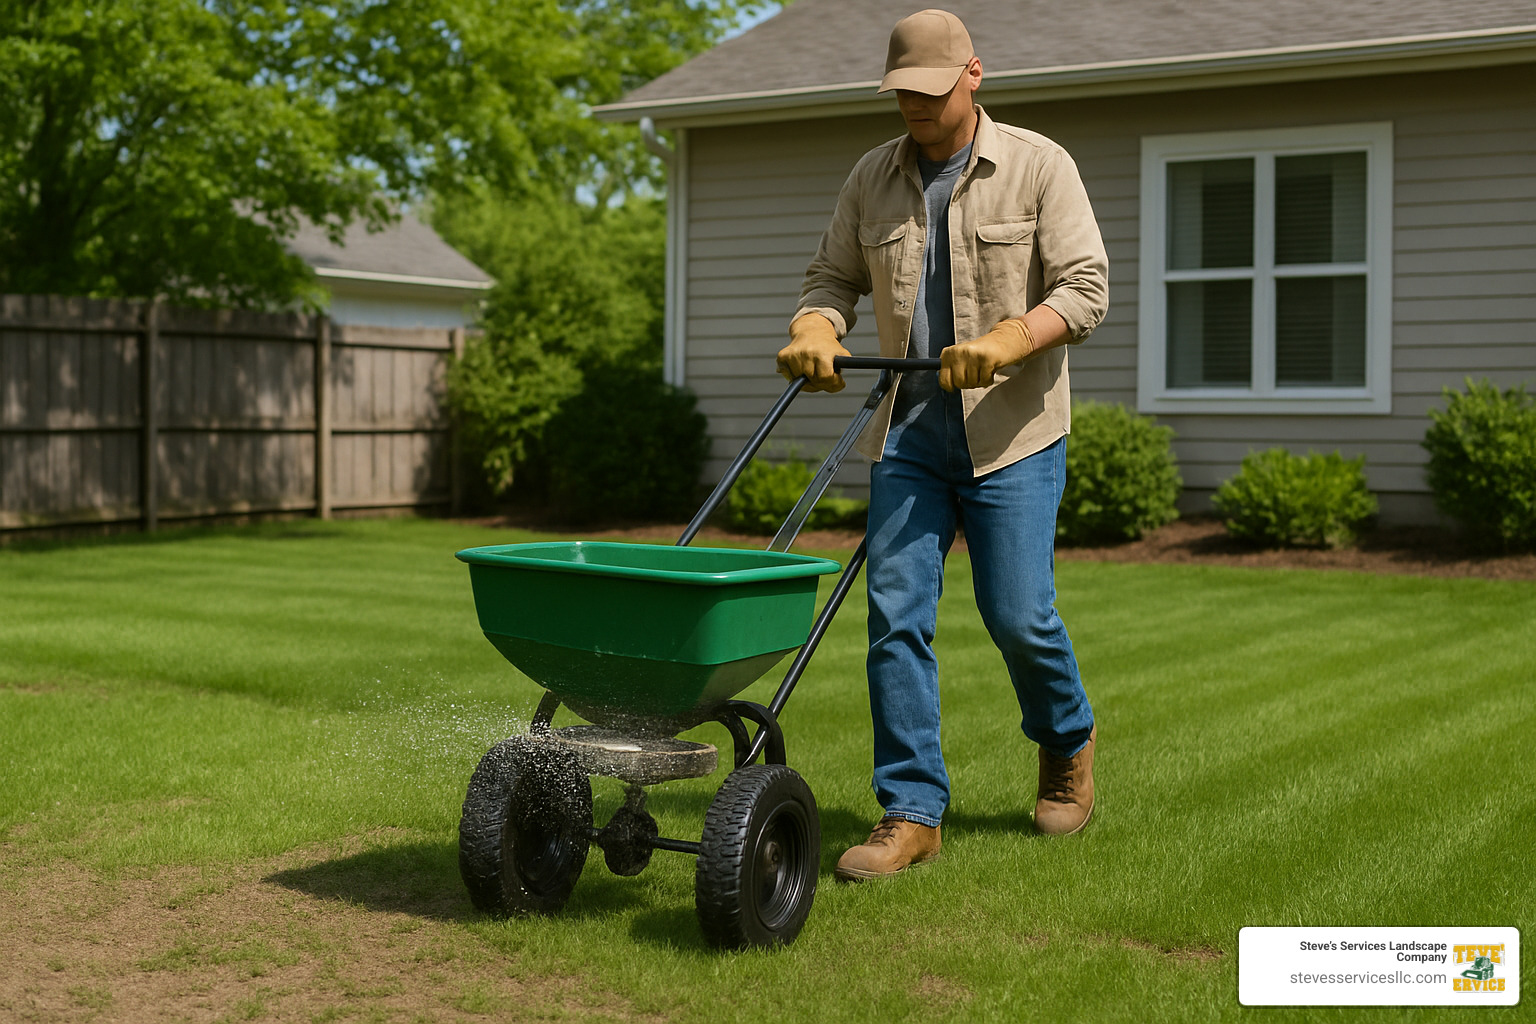
Beyond fertilization, your lawn will benefit from annual aeration, preferably in fall. This reduces soil compaction and improves nutrient penetration. Keep your mowing height at 3-3.5 inches for most Massachusetts lawns to promote deeper roots. For weed control, spot-treat as needed rather than applying weed-and-feed products across the entire lawn. This targeted approach is both more effective and better for the environment.
Signs You’re Overdoing It
Even with the best intentions, it’s possible to provide too much of a good thing. Your lawn will tell you when it’s getting more fertilizer than it can handle—you just need to know what to look for.
Yellow or brown tips on grass blades are often the first sign of fertilizer burn. If you notice scorched patches where the grass has turned completely brown after fertilization, that’s a clear indication you’ve applied too much. A spongy feeling when you walk on your lawn suggests excessive thatch buildup (more than 1/2 inch thick), which can result from over-fertilization.
Stripe patterns of different colored grass usually mean uneven application. And if you’re mowing every few days just to keep up with growth, your grass is likely getting too much nitrogen.
“I remember one client in Winchester who was mowing three times a week and still couldn’t keep up,” recalls our lawn technician. “His grass was growing so fast it was actually becoming weak and susceptible to disease. We found he was applying nearly triple the recommended amount of nitrogen. Once we adjusted his program, his lawn actually became healthier while requiring less maintenance.”
If you notice these symptoms, water deeply to flush excess fertilizer from the soil, skip your next scheduled feeding, consider core aeration to reduce thatch, and have your soil tested to determine actual nutrient needs.
Organic, Granular, or Liquid? Pros & Cons
When it comes to fertilizer types, each has its own set of advantages and considerations for your lawn.
Organic fertilizers improve soil health and release nutrients slowly, which means minimal burn risk and environmental benefits. The downside? They’re more expensive, produce slower results, contain lower nutrient concentrations, and sometimes have an unpleasant odor. Cost ranges average $45-$90 per 5,000 sq ft application, with premium products running up to $270 or more.
Granular synthetic fertilizers offer cost-effectiveness and are available in slow-release formulations that provide extended feeding. They’re easy to apply and come in precise nutrient ratios for specific lawn needs. However, there’s potential for burn if misapplied, and they may leach into waterways. Expect to pay $30-$70 per 5,000 sq ft application, with premium slow-release products costing up to $210 or more.
Liquid fertilizers deliver fast-acting results with even application and can often be combined with other treatments. The trade-offs include higher burn risk, shorter-lasting effects, and the need for more frequent application. These typically run $40-$80 per 5,000 sq ft application, with professional-grade products reaching $240 or more.
“For new sod in Massachusetts, we often recommend starting with a granular slow-release fertilizer,” says our product specialist. “It provides a good balance of immediate and sustained feeding with minimal risk. As the lawn matures, we might incorporate organic options to build soil health or liquid applications for targeted treatments.”
With proper aftercare and a thoughtful transition to regular maintenance, your new sod investment will continue to pay dividends in beauty and enjoyment for years to come. For more comprehensive information about keeping your new lawn healthy, check out our guide on Caring for New Sod.
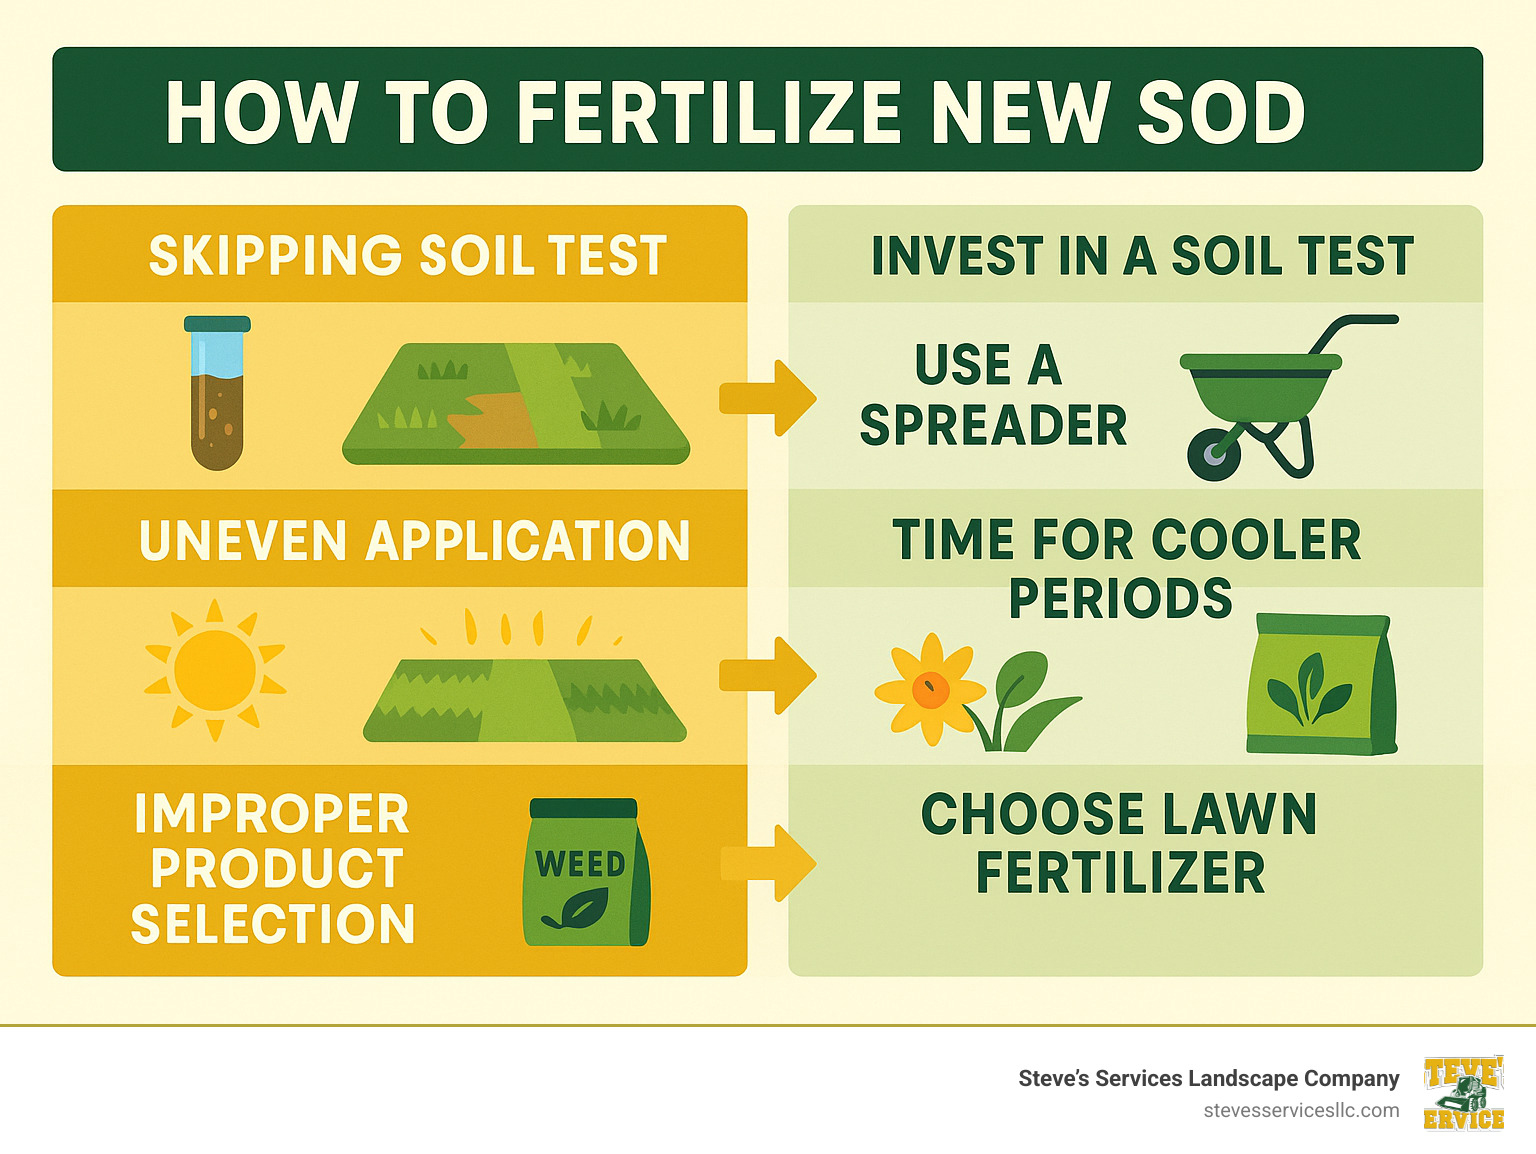
Common Mistakes & How to Avoid Them
Let’s face it – even with the best intentions, many of us stumble when it comes to caring for new sod. After installing hundreds of lawns across Massachusetts, I’ve seen the same fertilization missteps happen time and again. The good news? They’re all completely avoidable.

“I call these the ‘Fatal Five’ of new sod care,” jokes our training coordinator. “Avoiding these mistakes dramatically increases your chances of success – and keeps me from getting those panicked weekend phone calls!”
Skipping the Soil Test
Nothing sets your new lawn up for failure quite like flying blind. Many homeowners jump straight to fertilizing without knowing what their soil actually needs. It’s like prescribing medicine without a diagnosis!
A client in Medford learned this lesson the hard way: “I kept adding more and more fertilizer, but my lawn still looked terrible. When I finally got a soil test, I finded my pH was way off. No amount of fertilizer was going to fix that underlying issue.”
Solution: Invest in a proper soil test before installation and every 2-3 years thereafter. For around $15-$30, you’ll get precise recommendations that can save hundreds in wasted products and potential replacement costs. This simple step allows you to target specific deficiencies rather than playing an expensive guessing game.
Uneven Application
The telltale stripes of over-fertilized and under-fertilized areas aren’t just unsightly – they can seriously compromise your lawn’s health. Uneven application creates patches that grow at different rates and have varying levels of stress resistance.
Solution: Use a quality broadcast spreader with proper calibration. The technique matters too – apply half your fertilizer walking in one direction, then apply the remaining half walking perpendicular to your first pass. This crosshatch pattern ensures even coverage that gives your entire lawn the same fighting chance.
Fertilizing During a Heatwave
“I can’t tell you how many emergency calls we get in July from homeowners who decided that hot, sunny day was perfect for fertilizing,” says our lawn care specialist. “Heat stress plus fertilizer stress is a recipe for disaster.”
Applying fertilizer when temperatures exceed 85°F dramatically increases burn risk. The combination of heat, fertilizer salts, and potentially inadequate moisture can quickly turn your lush green investment into a patchy brown disappointment.
Solution: Time your applications for moderate temperature periods, especially in spring and fall. If summer application becomes necessary, use half the recommended rate of a slow-release product and water in thoroughly immediately afterward. Your lawn will thank you!
Walking on New Sod Too Soon
It’s tempting to get out there and enjoy your new lawn, but premature foot traffic compacts soil and disrupts delicate new root systems that are trying to establish. Even the process of fertilizing itself can cause damage if you’re walking directly on new sod.
Solution: Minimize all traffic for the first 2-3 weeks. When applying fertilizer during this sensitive period, use a broadcast spreader that allows you to reach areas from the perimeter, or lay down plywood boards to distribute your weight if you must walk on the new turf.
Using Weed-and-Feed Products on New Sod
Nothing makes homeowners more anxious than seeing the first weeds pop up in their pristine new lawn. But reaching for that weed-and-feed product too soon can be a costly mistake.
“One Stoneham customer shared this experience with me,” recalls our lawn technician. “‘I was so worried about weeds in my new lawn that I used a weed-and-feed product for my first fertilization. Within days, my new sod started showing stress. I learned my lesson about being patient with new turf.'”
Solution: Focus on fertilization alone for the first 3 months. Your priority should be establishing a strong root system. Address any weeds individually with targeted spot treatments rather than broadcast herbicides that can stress developing roots.
The most common thread I see running through all these mistakes is impatience. Good lawns, like most worthwhile things, take time. How to fertilize new sod correctly often means doing less, not more, especially in those critical first weeks.
When in doubt, it’s always easier to add more fertilizer later than to undo the damage of too much too soon. A measured, patient approach gives your new sod the best chance to develop into the lush, resilient lawn you’ve invested in.
Frequently Asked Questions About New-Sod Fertilization
When should I first fertilize after installation?
If you’re wondering about timing that first feeding, here’s the simple answer: wait about 30 days after your sod installation before reaching for the fertilizer. By this point, your new lawn should have developed enough roots to actually use those nutrients effectively without risking damage.
“You can perform a quick root check by gently lifting a corner of your sod,” I often tell homeowners. “If you feel some resistance and see those white roots reaching into the soil below, your lawn is telling you it’s ready for its first meal.”
That this timeline isn’t set in stone. If you installed your sod during a Massachusetts winter or late fall, it’s usually best to hold off until spring green-up before that first application. The grass needs to be actively growing to properly use the nutrients you’re providing.
How often do I feed sod in the first month?
Many eager homeowners are surprised when I tell them that during those first 30 days, your new sod primarily needs one thing: consistent moisture. The fertilizer schedule during establishment is actually quite simple:
Before installation: Apply starter fertilizer to the soil (as we discussed earlier)
First 30 days: Focus on watering properly; your sod doesn’t need additional fertilizer yet
Day 30: Apply your first post-installation fertilizer
Days 30-60: Continue with monthly fertilization during active growing season
“Your sod farm likely fertilized right before harvest,” I explain to customers. “So your new grass already has some nutrition to get it started in its new home.”
After you get through those first two months of establishment, you’ll transition to our seasonal Massachusetts schedule—typically 3-4 applications per year for our cool-season grasses, with special emphasis on those critical fall feedings.
What are symptoms of fertilizer burn and how do I fix them?
Even experienced homeowners can accidentally overdo it with fertilizer. Fertilizer burn happens when excess salts from the product draw moisture out of your grass blades and roots. You’ll know you’re dealing with it if you spot:
Yellow or brown grass tips that appear shortly after fertilizing
Crunchy, dry grass blades that don’t respond to normal watering
Distinct patterns that follow your fertilizer spreader path
Darkening roots that turn brown or black
Slow recovery despite increased watering
If you notice these warning signs, don’t panic—but do act quickly:
Water deeply and frequently for several days to flush those salts from the soil. Don’t mow until you see signs of recovery, and absolutely avoid adding any more fertilizer until your lawn has fully bounced back. A soil test after recovery can help determine what your lawn actually needs going forward.
“I always remind folks that with fertilizer burn, an ounce of prevention is worth a pound of cure,” shares our recovery specialist. “Always follow label rates carefully, apply to dry grass but slightly moist soil, and water thoroughly right after application.”
One of our Reading customers learned this lesson firsthand: “I accidentally doubled the recommended amount on my new sod and watched in horror as brown patches started forming. Steve’s team had me deep-water for three straight days. It saved most of my lawn, though I did need to replace a few sections. Now I measure with almost scientific precision!”
Conclusion
There’s something truly satisfying about watching a newly sodded lawn transform from fragile transplants into a lush, established carpet of green. The journey from installation to a fully rooted lawn requires patience, attention, and most importantly—proper nutrition at the right times.
Throughout this guide, we’ve walked through the essential steps of how to fertilize new sod for Massachusetts lawns. Remember the fundamentals: wait about 30 days after installation before that first feeding, select phosphorus-rich starter fertilizers that encourage root development, apply at the recommended rates, and always water thoroughly after application.
Your cool-season Massachusetts lawn faces unique challenges compared to lawns in other regions. Our New England winters, variable springs, and occasionally scorching summers all influence how and when you should feed your turf. By following a season-appropriate fertilization schedule, you’re not just growing grass—you’re building resilience against our regional weather patterns.
“The care you provide in those first few months pays off exponentially over the life of your lawn,” notes our senior technician. “I’ve seen countless examples where proper establishment led to lawns that stayed lush for decades with minimal problems.”
Think of your new sod investment as you would any other significant home improvement—the quality of installation matters, but the aftercare determines how well it holds up over time. A properly fertilized lawn doesn’t just look better; it requires less water, better resists pests and disease, and maintains its beauty through environmental stresses.
At Steve’s Services, we’ve helped homeowners across Burlington, Danvers, Everett, and surrounding Massachusetts communities establish lawns that become the envy of their neighborhoods. Whether you’re handling your lawn care personally or looking for professional assistance, understanding the science behind how to fertilize new sod makes all the difference.
Looking for more personalized guidance for your specific property’s needs? Our landscape professionals are just a call away, ready to provide customized solutions that account for your soil type, grass variety, sun exposure, and more.
For additional information about maintaining your investment, explore our detailed resources on caring for new sod and how to care for new sod. Your journey to a beautiful, healthy lawn is well underway, and we’re here to support you every step of the way.
