
Drip Pipes in Winter: 7 Essential Tips to Prevent Costly Damage
Why Drip Pipes in Winter Can Save You Thousands
Drip pipes in winter is one of the most effective ways to prevent costly pipe bursts when temperatures drop below freezing. Here’s what you need to know:
Quick Answer:
• When: Start dripping when temps hit 20°F (-6.6°C) or lower
• Where: Faucets on exterior walls, garages, crawl spaces, unheated areas
• How: Let both hot and cold water drip at 1-2 drips per second
• Cost: $2-10 extra on water bill vs. $5,000-26,000 in burst pipe damage
When temperatures plummeted during the 2021 Texas freeze, thousands of homeowners faced repair bills exceeding $26,000 from just two broken pipes. Yet the simple act of letting faucets drip could have prevented most of this damage.
The science is straightforward: water expands when it freezes, creating tremendous pressure inside pipes. A single burst pipe can cause $5,000 or more in water damage, while letting a faucet drip adds only a few dollars to your monthly water bill.
Moving water is much harder to freeze than standing water. Even a small drip keeps water flowing through your pipes, preventing ice crystals from forming and relieving pressure if freezing does occur.
I’m Steve Sylva, owner of Steve’s Services Landscape Company, and over 25 years I’ve helped countless Massachusetts homeowners protect their properties from winter damage, including coordinating drip pipes in winter strategies with trusted plumbing partners. My experience has shown that simple prevention steps can save thousands in emergency repairs and water damage restoration costs.

Simple drip pipes in winter word guide:
– cost to repair frozen sprinkler system
– frozen irrigation system
– frozen sprinkler backflow valve
Why Pipes Freeze and Burst
When winter temperatures drop, your home’s plumbing faces a powerful enemy: water’s unique ability to expand when it freezes. Unlike most substances that shrink when they get cold, water actually grows larger—about 9% bigger, to be exact. That might not sound like much, but inside the confined space of a pipe, this expansion creates tremendous pressure.
Think of it like trying to squeeze into jeans that are too small. Something’s got to give, and unfortunately, it’s usually your pipes.
The 20°F danger zone is when homeowners need to start taking drip pipes in winter seriously. At this temperature, the risk of freezing becomes real, especially for vulnerable plumbing. But here’s the catch: uninsulated pipes can freeze at even higher temperatures when wind chill or poor insulation comes into play.
Not all pipes are created equal when it comes to freeze risk. Exterior wall plumbing takes the biggest hit because these pipes are closest to the cold outside air. In my 25 years serving Massachusetts communities from Burlington to Winchester, I’ve seen this pattern countless times.
Garages, crawl spaces, and unheated attics are like ice boxes for your plumbing. These areas often lack proper heating and insulation, making them prime spots for freeze damage. Basement homes typically fare better than slab construction because basements provide natural insulation from ground temperature.
Regional construction differences matter more than you might think. Here in Massachusetts, we’re used to building for cold weather, but homes with slab foundations or pier-and-beam construction leave pipes more exposed to freezing temperatures. These designs work fine in warmer climates but can spell trouble during our harsh New England winters.
When water freezes inside a pipe, it doesn’t just expand—it creates pressure that can reach thousands of pounds per square inch. Even the strongest copper or PVC pipes can’t handle this force. The result? Cracks, splits, or complete pipe ruptures that can flood your home in minutes.
This is exactly why scientific research on water expansion consistently shows that keeping water moving through vulnerable pipes is your best defense against winter damage.
Drip Pipes in Winter: When & Where to Let Faucets Run
The magic number for drip pipes in winter is 20°F. When the thermometer hits this point—or forecasters predict it will—it’s time to take action. This isn’t just a random number plumbers made up; it’s the temperature where your pipes face real danger of freezing and bursting.
But here’s the thing: not every faucet in your house needs to become a miniature waterfall. You need to be strategic about which ones to target. After 25 years of helping Massachusetts homeowners through brutal winters, I’ve learned that kitchen sinks on exterior walls are usually the first casualties. These pipes often run right through wall cavities with minimal insulation between them and the bitter cold outside.
Bathroom fixtures over garages are another trouble spot we see constantly in communities like Medford and Woburn. Think about it—these pipes are dealing with cold from below (unheated garage) and often cold from the side (exterior wall). It’s like a perfect storm for freezing.
The type of faucet you’re dealing with matters too. With single-handle faucets, you’ll want to position the handle at that lukewarm middle setting. This keeps both your hot and cold water lines moving. For two-handle faucets, crack open both taps slightly. Don’t just run the cold water—your hot water pipes can freeze too, and nobody wants to deal with water heater problems on top of burst pipes.
| Cost Comparison | Daily Water Use | Monthly Cost | Burst Pipe Repair |
|---|---|---|---|
| Steady Drip | 5 gallons/day | $2-10 | $5,000-$26,000 |
Garages and crawl spaces deserve special attention because they’re usually unheated. Any plumbing running through these areas is sitting ducks when temperatures plummet. Unheated attics are equally vulnerable—warm air doesn’t rise high enough to protect pipes up there during severe cold snaps.
One thing to keep in mind: during extreme cold events, your local water utility might experience pressure drops as everyone in town starts dripping faucets. Some municipalities even issue advisories about this. But honestly? A slightly lower water pressure is infinitely better than dealing with burst pipes and thousands in damage.
Temperature Triggers for Drip Pipes in Winter
Weather forecasts become your best friend when protecting your pipes. I tell my clients to start paying attention when temperatures are predicted to drop below 25°F. This gives you time to prepare rather than scrambling at midnight when the cold hits.
Wind chill makes everything worse. A 25°F day with 30 mph winds can freeze pipes faster than a still 20°F night. Don’t just look at the air temperature—consider the whole weather picture.
If you’re planning a winter getaway (lucky you!), keep your thermostat at 55°F minimum indoors. This baseline temperature helps protect pipes in heated areas of your home. But you’ll still need someone checking on drip pipes in winter for those vulnerable spots we talked about.
Which Fixtures Need Drip Pipes in Winter
You don’t need to turn your entire house into a water park. Focus on the vulnerable spots: exterior wall sinks in kitchens are prime targets, especially in older homes where insulation standards weren’t what they are today.
Laundry rooms often get forgotten, but they’re frequently located in basements, garages, or utility areas where pipes are more exposed. These fixtures deserve the same attention as your main kitchen and bathroom faucets.
Here’s a good rule of thumb: aim for at least one dripping faucet per major section of your home. If you have a two-story house, pick one upstairs and one downstairs. This keeps water moving throughout your entire plumbing system, not just one branch.
Hot or Cold? The Right Way to Drip
This is where people often get it wrong. Both hot and cold water lines need protection. Running only cold water leaves your hot water pipes sitting there like frozen time bombs. Running only hot water wastes energy and ignores half your plumbing system.
For single-handle faucets, that lukewarm midpoint setting is perfect—it pulls from both supply lines simultaneously. With two-handle faucets, you’ll see a small drip from each tap when you’ve got it right.
This approach also helps your water heater cycle properly by preventing stagnant water in hot water lines. It’s a win-win for your entire plumbing system. And if you’re thinking about comprehensive water system protection, our irrigation system upgrades can help protect your outdoor water lines year-round.
How to Drip Correctly Without Wasting Water
Getting drip pipes in winter right is all about finding that sweet spot between protection and conservation. You want just enough water movement to prevent freezing without turning your faucet into a mini waterfall.
The perfect drip rate looks about as thick as a pencil lead—roughly 1-2 drips per second. Picture the rhythm of a slow metronome. This gentle flow keeps water moving through your pipes without sending your water bill through the roof. You definitely don’t need a steady stream gushing out; that’s just money down the drain.
Here’s where timing gets smart: you don’t have to run a 24-hour drip marathon. Start when temperatures hit that critical 20°F mark and keep it going until they climb back above freezing for several hours. Many of our Massachusetts neighbors have great success dripping only during the coldest overnight hours—typically from around 10 PM to 6 AM—then shutting it off if morning temperatures rise.
Common mistakes can sabotage even the best drip strategy. The biggest one? Forgetting to open those cabinet doors under sinks. Closed cabinets trap cold air around pipes, defeating your drip efforts. Another frequent slip-up is only opening one side of a two-handle faucet—remember, you need both hot and cold lines protected. And please resist the urge to crank that faucet wide open; it’s wasteful and unnecessary.
Let’s talk about the water bill reality check that worries so many homeowners. A proper drip at one drip per second uses about 5 gallons per day. Even during a week-long cold snap, this typically adds just $2-10 to your monthly water bill. Compare that to burst pipe repairs, which can easily cost $5,000-$25,000, and suddenly that extra water expense looks pretty reasonable.
For those who care about sustainability (and we love that!), there’s a clever workaround. Catch that drip water in buckets or containers and give it a second life watering houseplants, cleaning, or other household tasks. It’s amazing how much water you can collect overnight. Does letting your faucets drip really work? The research consistently shows it absolutely does, making this small water investment one of the smartest moves you can make.
Drip Pipes in Winter & Your Utility Bill
The numbers tell a reassuring story about drip pipes in winter costs. Even during extended cold periods, the average extra expense ranges from just $2-10 per month. When you consider that basic burst pipe repairs typically cost $1,000-$4,000 (and can skyrocket to $20,000+ with extensive water damage), that small monthly bump becomes incredibly worthwhile.
Conservation tactics can trim even this modest cost increase. The bucket method works wonderfully—catch that drip water and repurpose it for watering plants, mopping floors, or filling your pet’s water bowl. Some resourceful homeowners cut their drip costs in half by only running water during peak cold hours, usually overnight when temperatures hit their lowest point.
You’re not just paying for water—you’re investing in peace of mind and protecting one of your home’s most expensive systems.
Beyond Dripping: Comprehensive Pipe Protection
While drip pipes in winter provides excellent protection, the smartest homeowners use multiple layers of defense against freezing temperatures. Think of it like wearing a winter coat—you wouldn’t rely on just a t-shirt when it’s 20°F outside.
Foam insulation sleeves are your first line of defense after dripping. These inexpensive foam tubes slip over exposed pipes and can raise the water temperature inside by 3-4°F. That might not sound like much, but it’s often the difference between flowing water and a frozen pipe. I’ve seen these simple sleeves save homeowners thousands in our Massachusetts service areas.
For pipes that face serious freeze risk, UL-listed heat tape provides active protection. This electrical heating element wraps around your most vulnerable pipes and automatically kicks in when temperatures drop. It’s like having a tiny electric blanket for your plumbing. Just make sure you buy UL-listed products—safety matters when you’re dealing with electricity and water.
Here’s a trick that costs absolutely nothing: open cabinet doors under sinks on exterior walls. This lets warm indoor air circulate around those hidden pipes. It’s amazing how much this simple step helps, especially in kitchens where the sink backs up to an outside wall.
Don’t forget about your garage doors—keep them shut when water lines run through the garage. An open garage door can drop temperatures enough to freeze pipes, even when it’s not severely cold outside.
Outdoor spigot covers and proper drainage of hose connections are essential for exterior plumbing. Even those fancy freeze-proof faucets can fail if you leave a hose attached or if water gets trapped in the wrong place. It’s like leaving your car windows down in a rainstorm—the protection only works if you use it correctly.
Smart leak sensors act like smoke detectors for water damage. These clever devices can send alerts to your phone if they detect moisture where it shouldn’t be. While they won’t prevent freezing, they can catch problems early before small leaks become major floods.
If you’re renting, understand that tenant and landlord responsibilities vary, but everyone benefits when pipes don’t burst. Tenants should report heating problems immediately, while landlords typically handle maintaining adequate heat and pipe protection.
Planning to travel this winter? Create a winter checklist that includes arranging for someone to monitor your drip pipes in winter strategy, keeping your thermostat at least 55°F, and having emergency contacts ready. A frozen pipe doesn’t care that you’re enjoying warm weather in Florida.
For comprehensive protection of all your property’s water systems, including outdoor irrigation, learn more about our irrigation system repair services.
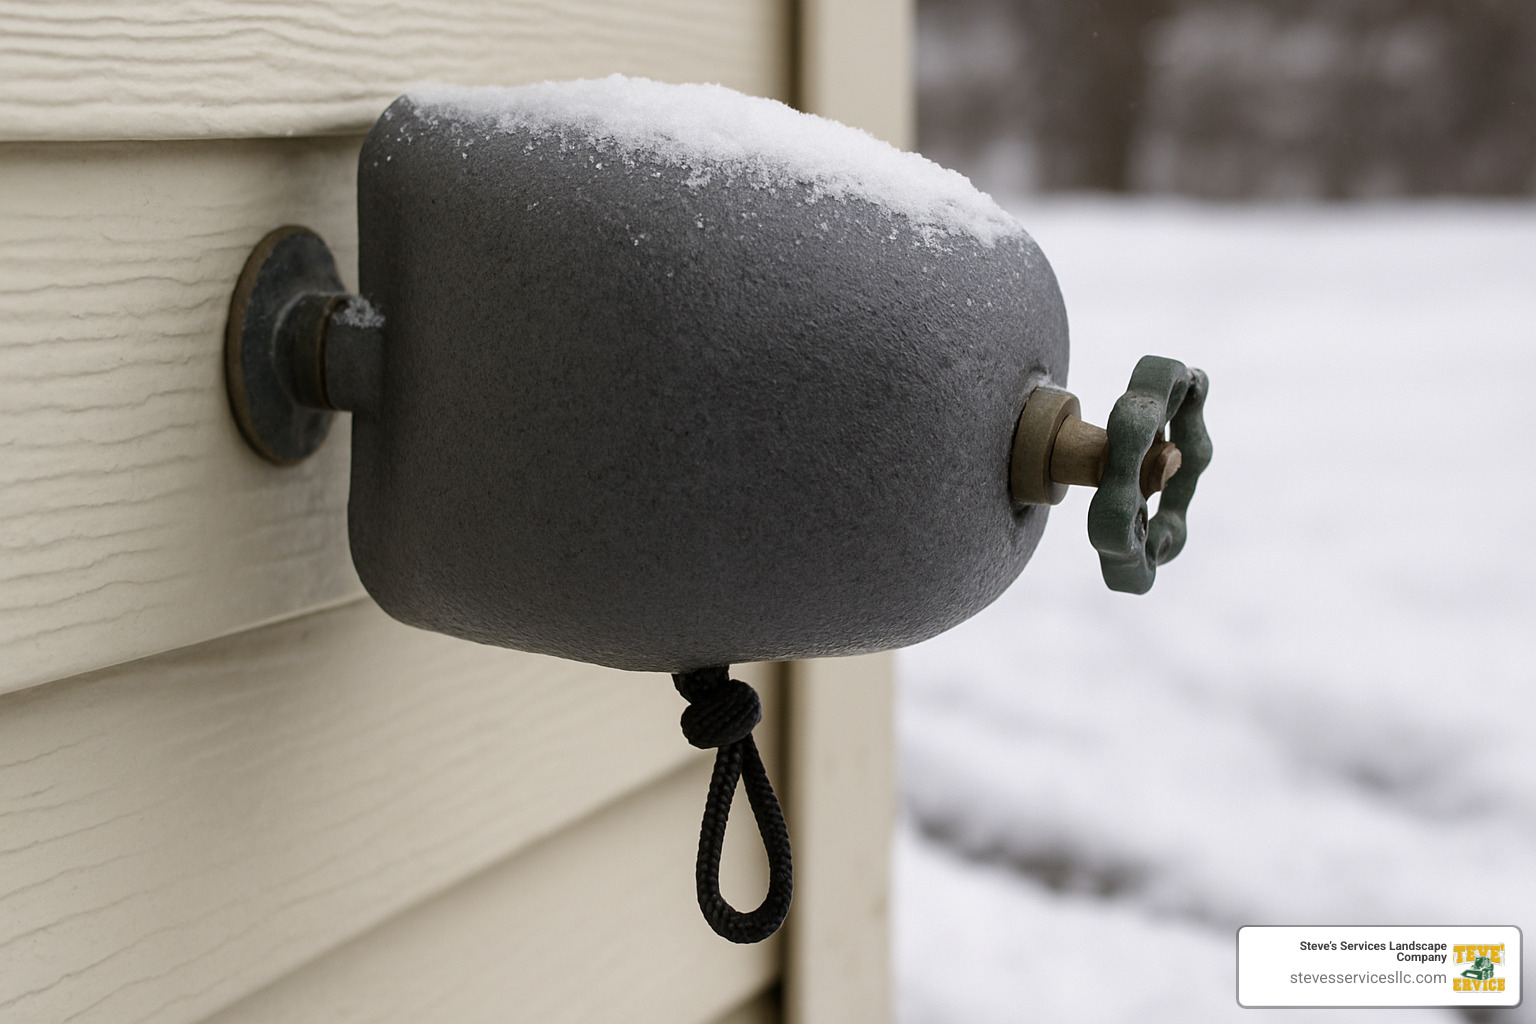
Outdoor Faucets: Drip, Drain or Cover?
Outdoor faucets face the harshest conditions because they’re completely exposed to winter weather. Even those freeze-proof spigots that seem so reliable have an Achilles heel—they depend on proper installation and maintenance to work correctly.
The winning strategy for outdoor faucets isn’t dripping—it’s draining and covering. First, locate the shut-off valves for your outdoor faucets (usually inside your basement or crawl space) and turn them off. Next, disconnect and completely drain all hoses. Finally, cover the outdoor faucet with an insulated cover.
This three-step approach beats simple dripping because outdoor dripping can create ice buildup around your home’s foundation and create dangerous slip hazards. Nobody wants to explain to their insurance company how someone got hurt on an icy walkway that formed from dripping faucets.
If your home doesn’t have shut-off valves for outdoor faucets, you’re dealing with a significant vulnerability. Professional installation of these valves is worth every penny for long-term protection and peace of mind.
Alternatives & Add-Ons
For homeowners who want premium protection, self-regulating heat cable represents the top-tier solution. These smart systems automatically adjust their heat output based on temperature, providing efficient protection without wasting energy or overheating your pipes.
Pipe-wrap products offer a middle ground between basic foam insulation and active heating systems. These insulated sleeves work particularly well for pipes in crawl spaces or other semi-protected areas where full heat tape might be overkill.
Crawl-space heaters can protect entire areas of vulnerable plumbing at once, though they require proper ventilation and safety considerations. These systems need professional installation to ensure they operate safely and effectively.
Professional winterization services provide comprehensive protection for homeowners who prefer expert assistance. These services typically include pipe insulation, heat tape installation, and outdoor faucet protection—basically everything we’ve discussed, handled by professionals who do this work every day.
When Precautions Fail: Frozen or Burst Pipe Action Plan
Even with the best drip pipes in winter strategies, sometimes Mother Nature wins. When temperatures plummet unexpectedly or pipes in hidden areas freeze despite your efforts, knowing how to respond quickly can mean the difference between a minor inconvenience and a major disaster.
Recognizing the warning signs early is your first line of defense. If you turn on multiple faucets and get little to no water flow, that’s your biggest red flag. You might also notice unusual odors coming from drains, strange gurgling or banging sounds from inside walls, or visible frost on any exposed plumbing in basements or crawl spaces.
Don’t panic if you spot these symptoms—frozen doesn’t always mean burst. Many pipes can be safely thawed if you act quickly and carefully.
Safe thawing starts with a simple hair dryer. Focus the warm air on the frozen section of pipe, working from the faucet back toward the frozen area. This gentle heat source won’t damage your pipes or create safety hazards. Whatever you do, never reach for a propane torch, space heater, or open flame—these can crack pipes, start fires, or create dangerous situations.
Always make sure you’re not standing in water while using any electrical device. If there’s already water on the floor, shut off electricity to that area before attempting any thawing.
If you find a burst pipe, your first move should be to the main water shut-off valve. Every family member should know where this is located and how to operate it. Stopping the water flow immediately prevents thousands of gallons from flooding your home.
Next, grab your phone and start documenting everything. Take photos of the burst pipe, any water damage, and affected belongings. These images become crucial for insurance claims and help plumbers understand the scope of the problem before they arrive.
Call a licensed plumber immediately—this isn’t a DIY repair situation. Burst pipes require professional expertise to ensure proper repairs and prevent future problems. While you wait for help to arrive, try to move valuables away from the affected area and start removing standing water if it’s safe to do so.
Insurance claims should begin the same day if possible. Contact your insurance company’s emergency line, provide them with your documentation, and ask about coverage for emergency repairs and temporary housing if your home becomes uninhabitable. Keep every receipt related to the incident, from emergency plumber calls to hotel stays.
The financial reality of pipe failures can be sobering. Basic pipe repairs typically range from $250 to $1,500, but that’s just the beginning. Water damage restoration costs can easily reach $5,000 to $20,000 or more, depending on how much water escaped and which areas of your home were affected. These represent average costs based on internet data and not actual costs for Steve’s Services.
For outdoor irrigation systems, frozen pipes present their own challenges. Our team at Steve’s Services has seen countless sprinkler lines damaged by inadequate winterization. We can help coordinate repairs and implement better freeze protection strategies. Learn more about our frozen irrigation system services.
The key takeaway? Prevention through drip pipes in winter costs pennies compared to repair bills. But when prevention fails, quick action and professional help minimize the damage and get your home back to normal as quickly as possible.

Frequently Asked Questions about Drip Pipes in Winter
Do I still need to drip if I have PEX piping?
This is one of the most common questions I hear from homeowners who’ve upgraded their plumbing. While PEX piping is definitely more flexible and freeze-resistant than traditional copper or PVC pipes, it’s not invincible against winter’s worst weather.
PEX can still burst when water freezes inside, though it may survive a few more freeze-thaw cycles than rigid piping materials. The plastic material can expand somewhat with the ice, but there’s still a breaking point where the pressure becomes too much.
Drip pipes in winter remains just as important for PEX systems, especially when those pipes run through vulnerable locations like exterior walls, garages, or crawl spaces. The physics of water expansion doesn’t change based on your pipe material—ice still creates tremendous pressure that can damage any plumbing system.
Should I avoid dripping during citywide low-pressure alerts?
This question comes up during major cold snaps when everyone in town is thinking the same thing about protecting their pipes. It’s a balancing act between being a good community member and protecting your home.
Here’s my take: monitor your local utility advisories closely, but low pressure situations are typically temporary, while burst pipes create permanent and expensive damage. Most water departments understand that residents need to protect their plumbing during extreme weather.
If your municipality specifically requests residents to stop dripping faucets due to pressure concerns, consider ramping up your alternative protection methods. Increase heating in vulnerable areas, keep those cabinet doors wide open under sinks, and maybe add some temporary insulation around exposed pipes.
The reality is that a few dollars in extra water usage is still far cheaper than dealing with burst pipes and water damage that can cost thousands to repair.
Is a slow trickle enough during multi-day sub-zero events?
When we’re dealing with those brutal New England cold snaps that seem to go on forever, you might need to adjust your drip pipes in winter strategy. A gentle drip that works fine for overnight freezes might not cut it during extended extreme cold.
During multi-day sub-zero events, increase your drip rate slightly—aim for a pencil-lead-width stream rather than individual drips. Think of it like this: the longer and more severe the cold, the more water movement you need to prevent ice from forming.
I’ve seen too many homeowners get caught off guard during those extended cold periods we sometimes get here in Massachusetts. The pipes that survived the first night or two suddenly burst on day three because the cold just kept penetrating deeper into the building structure.
The key is staying vigilant throughout the entire cold event, not just the first night. Check your drips periodically to make sure they’re still flowing, and don’t be afraid to increase the flow rate if temperatures stay brutally low for days on end.
Conclusion
When winter temperatures threaten to drop below freezing, drip pipes in winter becomes your home’s first line of defense against expensive plumbing disasters. This simple strategy has saved countless homeowners thousands of dollars in repair bills, all for the cost of a few extra gallons on their water bill.
The beauty of this approach lies in its simplicity. When the thermometer hits 20°F, you know it’s time to let those faucets drip. Focus on the vulnerable spots—exterior wall faucets, garage bathrooms, and unheated areas—and keep both hot and cold water moving at that steady pencil-lead-width flow. It’s a small action that prevents big problems.
But protecting your home’s water systems goes beyond just indoor plumbing. Your outdoor irrigation systems, sprinkler lines, and landscape water features need winter protection too. That’s where our expertise at Steve’s Services Landscape Company comes in handy.
Over our 25 years serving Massachusetts communities from Burlington to Winchester, we’ve seen what winter can do to unprepared properties. We’ve also learned that the smartest homeowners take a comprehensive approach to winter protection. While you’re implementing drip pipes in winter strategies for your indoor plumbing, we can work with trusted local plumbing professionals to ensure every water line on your property is properly protected.
Whether you need help winterizing irrigation systems, protecting outdoor spigots, or coordinating with plumbing experts for comprehensive freeze protection, we understand how all these systems work together. Our team has the experience to spot potential trouble areas and recommend solutions before problems develop.
The math is simple: spending a few dollars on prevention beats spending thousands on emergency repairs every time. When you combine smart drip pipes in winter techniques with professional outdoor water system protection, you’re giving your home the complete winter defense it deserves.
Ready to protect your entire property this winter? Learn more about our comprehensive approach to winter water system protection: Irrigation Systems & Winter Protection.
