Grass seeding spray: 5 Powerful Reasons to Try in 2025
The Truth About Spray-On Grass Solutions
Grass seeding spray is a lawn establishment method that combines seeds, mulch, fertilizer, and binding agents in a liquid solution that can be sprayed onto soil. Here’s what you need to know:
- What it is: A slurry mixture applied through spraying that contains grass seed, mulch, fertilizer, and tackifiers
- Types: Professional hydroseeding, DIY hose-end kits (like Hydro Mousse), hydromulching
- Cost: $0.06-$0.20 per square foot for professional hydroseeding; $19.95-$79.80 for DIY kits
- Effectiveness: Shows visible growth in 1-2 weeks vs. 3-6 weeks for traditional seeding
- Best for: Large areas, slopes, erosion control, and hard-to-reach spots
Have you ever stared at your patchy lawn and wished you could simply spray on a perfect carpet of grass? The promise of spray-on grass seed products is tempting – quick, easy application with faster results than traditional seeding. But do these products deliver, or are they just another lawn care gimmick?
As a landscape professional, I’ve seen homeowners invest in countless “miracle” lawn solutions, only to be disappointed when reality doesn’t match the advertising. The truth is that grass seeding spray technology offers genuine benefits in certain situations, but it’s not a magical fix for every lawn problem.
My name is Steve Sylva, and with over 25 years in the landscape industry, I’ve tested numerous grass seeding spray products and professional hydroseeding techniques across hundreds of properties in Massachusetts. Let me share what actually works when it comes to spray-on grass solutions based on real-world results, not marketing hype.
How Does Spray-On Seeding Work?
Ever wonder what makes grass seeding spray so effective? It’s all about creating the perfect environment for your grass seeds to thrive. Unlike traditional seeding where seeds often sit exposed on the soil surface (sometimes becoming bird food!), spray-on methods surround your seeds in a protective slurry that gives them everything they need to get growing.
The magic happens through maximizing seed-to-soil contact. When seeds are properly nestled against soil particles, they can easily access moisture and nutrients needed for germination. The spray-on slurry essentially tucks your seeds into a perfect little bed, keeping them exactly where they need to be.
This approach is particularly valuable on slopes where traditional seeds often wash away before they can establish roots. Research has consistently shown that grass seeding spray methods provide superior erosion control compared to broadcast seeding alone. Scientific research on erosion control demonstrates how the binding agents in the slurry help keep everything in place, even during heavy rainfall.
Inside the Slurry
The slurry mixture in grass seeding spray isn’t just seeds and water—it’s a carefully formulated blend designed to create ideal growing conditions. Think of it as a complete starter package for your lawn.
Water serves as the carrier, allowing for even distribution across your soil. The mulch fiber (typically wood or paper-based) acts like a sponge, holding moisture around the seeds and protecting them from drying out—it can absorb up to 10 times its weight in water! This moisture retention is crucial during those first critical days of germination.
Your grass needs nutrients right from the start, which is why fertilizer with balanced N-P-K (nitrogen, phosphorus, and potassium) is included in the mix. The tackifier is the unsung hero—this sticky substance helps everything adhere to the soil, preventing washout during rainstorms.
That bright green dye isn’t just for show (though it does look satisfying!). It serves a practical purpose by making application visible so you can easily see where you’ve sprayed and avoid missed spots or overlapping too much.
Benefits Over Broadcast Seeding
When I compare traditional broadcast seeding to grass seeding spray methods with my clients, the advantages become immediately clear. Even coverage is perhaps the most obvious benefit—the spray application ensures seeds are distributed uniformly, eliminating those frustrating bare patches that often result from hand-seeding.
Faster growth is another major advantage. The protective environment created by the slurry can accelerate germination by up to 50% compared to traditional methods. This means you’ll see those first green sprouts emerging in days rather than weeks.
For properties with any kind of slope stability concerns, spray methods are simply best. The tackifier component literally glues seeds in place until they can establish roots strong enough to hold the soil themselves.
The reduced labor requirement can’t be overlooked either. One person with the right equipment can cover large areas quickly and effectively—something I’ve personally appreciated when working on larger properties throughout Massachusetts.
When done properly, grass seeding spray creates an ideal microenvironment for germination while protecting your investment from birds, heavy rain, and extreme temperatures. It’s not magic—it’s just smart lawn science that works with nature instead of against it.
Grass Seeding Spray: Types & Ingredients
When it comes to creating that lush, green carpet for your yard, not all grass seeding spray options deliver the same results. I’ve seen homeowners get confused by the various products on the market, so let’s break down your options in plain English.
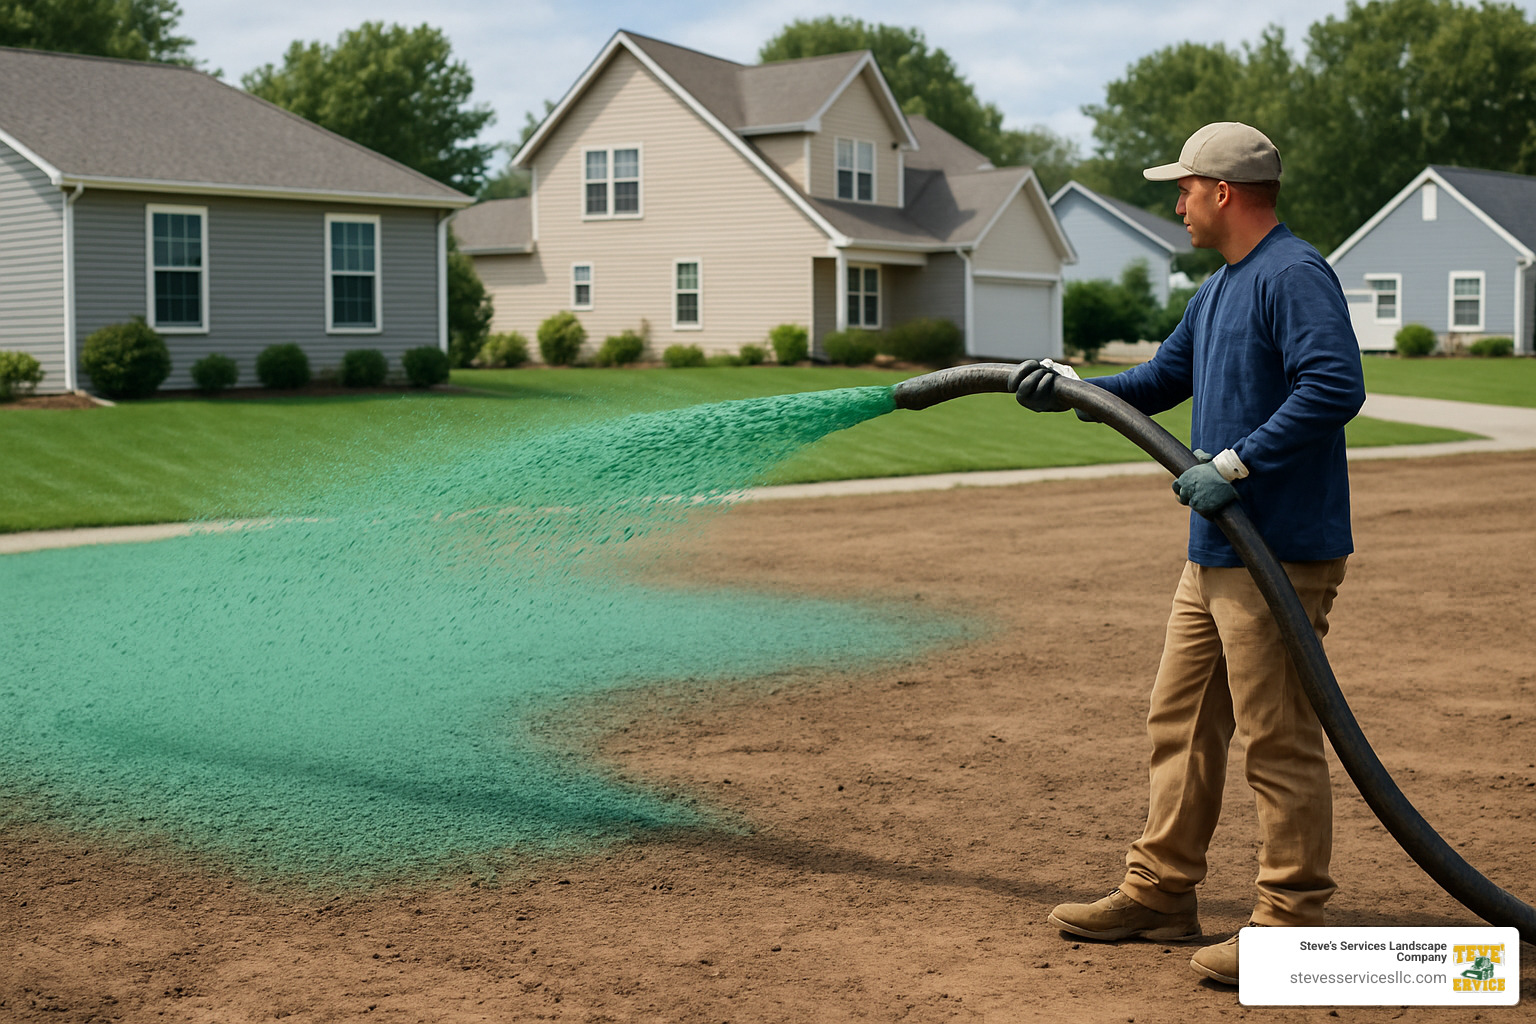
Professional Hydroseeding
This is what we pros consider the gold standard when you want serious results. Professional hydroseeding combines specialized equipment with custom-mixed slurry custom to your specific soil conditions.
When we pull up with our hydroseeding equipment—whether it’s a compact trailer unit for tight urban yards or a truck-mounted powerhouse for larger properties—we’re bringing serious lawn-creating firepower. The magic happens when we mix water, premium seed blends, mulch, fertilizer, and binding agents into a thick, consistent slurry that creates the perfect environment for seed germination.
What makes professional hydroseeding stand out is the customization. We select seed varieties based on your soil tests, sun exposure, and even how you plan to use your lawn. A lawn that will host backyard football games needs different reinforcement than a showcase front yard!
Professional hydroseeding typically costs between $0.06 and $0.20 per square foot based on internet data (not Steve’s Services rates), and one application can cover thousands of square feet in just minutes.
Hydromulching
People often confuse hydromulching with hydroseeding, but they’re actually different processes. Hydromulching applies a protective mulch slurry without seeds—it’s primarily used for erosion control on steep slopes or as a second layer after traditional seeding.
Think of hydromulching as putting a protective blanket over your soil. It’s particularly valuable during New England’s heavy spring rains when newly seeded areas might otherwise wash away.
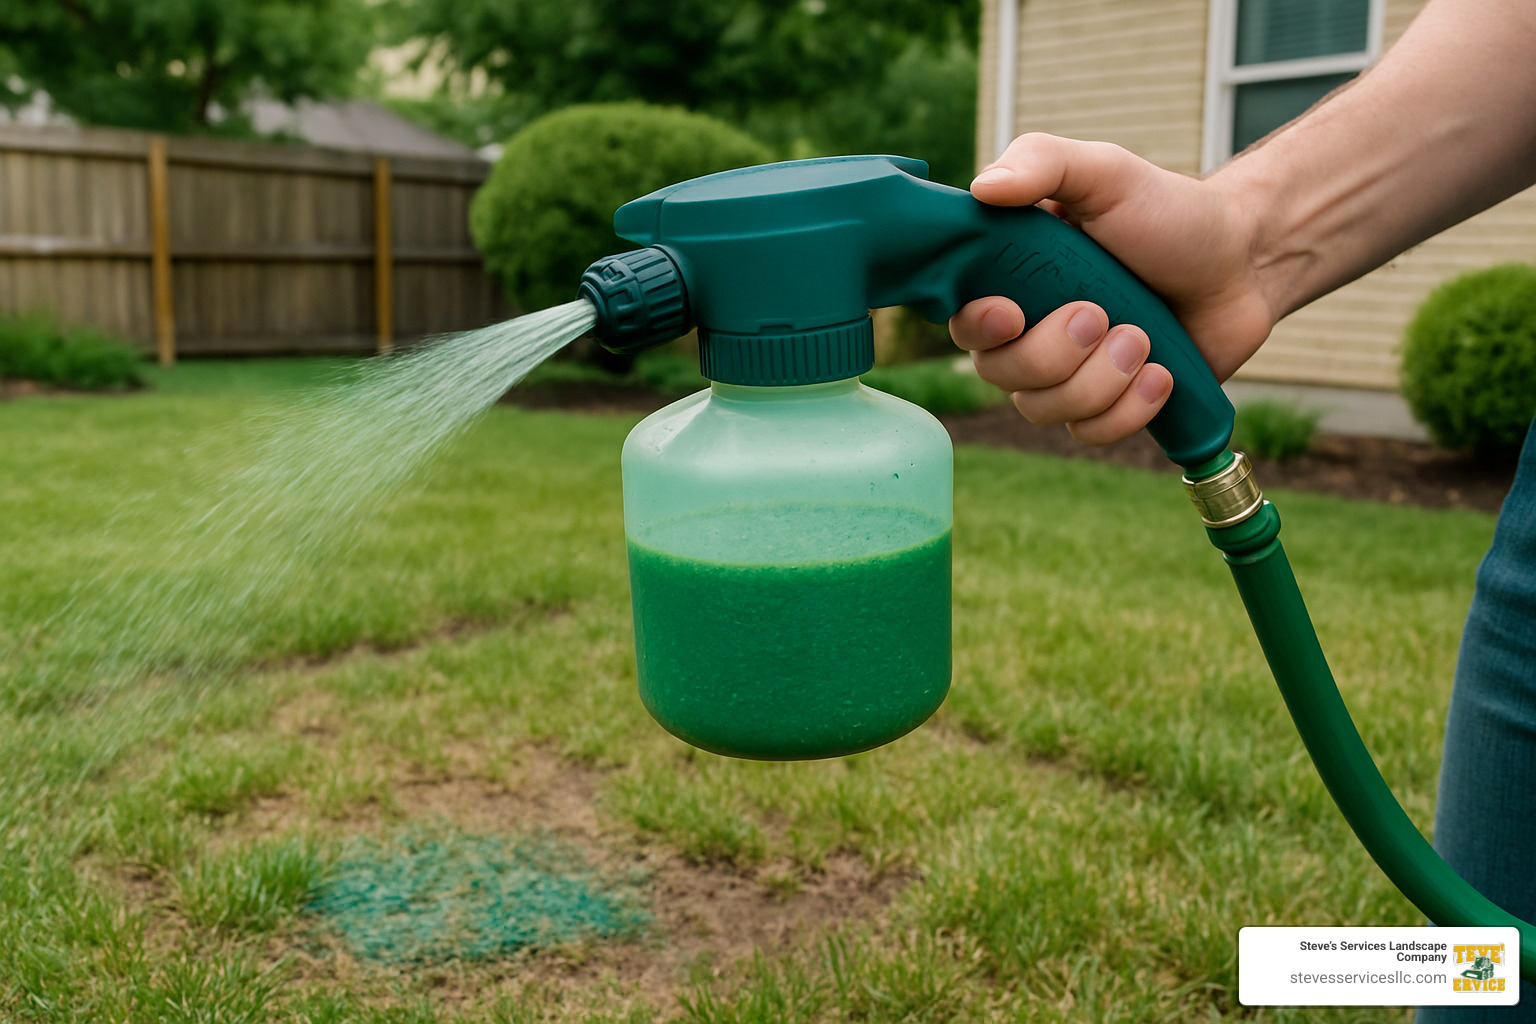
DIY Hose-End Grass Seeding Spray Kits
For homeowners looking to tackle small bare spots, retail products like Hydro Mousse have become increasingly popular. These grass seeding spray kits connect to your garden hose and spray a mixture of seed and binding agents onto your soil.
The appeal is obvious—they’re convenient and promise professional-looking results without the equipment or cost. You get that satisfying green foam showing exactly where you’ve applied the product, and they’re perfect for those annoying dog spots or bare patches along walkways.
However, I need to be honest with you—our testing shows these products work best for small areas under 500 square feet. The seed distribution isn’t as consistent as professional applications, and the binding agents aren’t as effective at holding everything in place during heavy rain.
Most kits come pre-loaded with a mix of tall fescue, perennial ryegrass, and Kentucky bluegrass, which may not be ideal for every yard in Massachusetts. They typically cover between 100-500 square feet per container, making them more suitable for spot treatments than whole-lawn renovations.
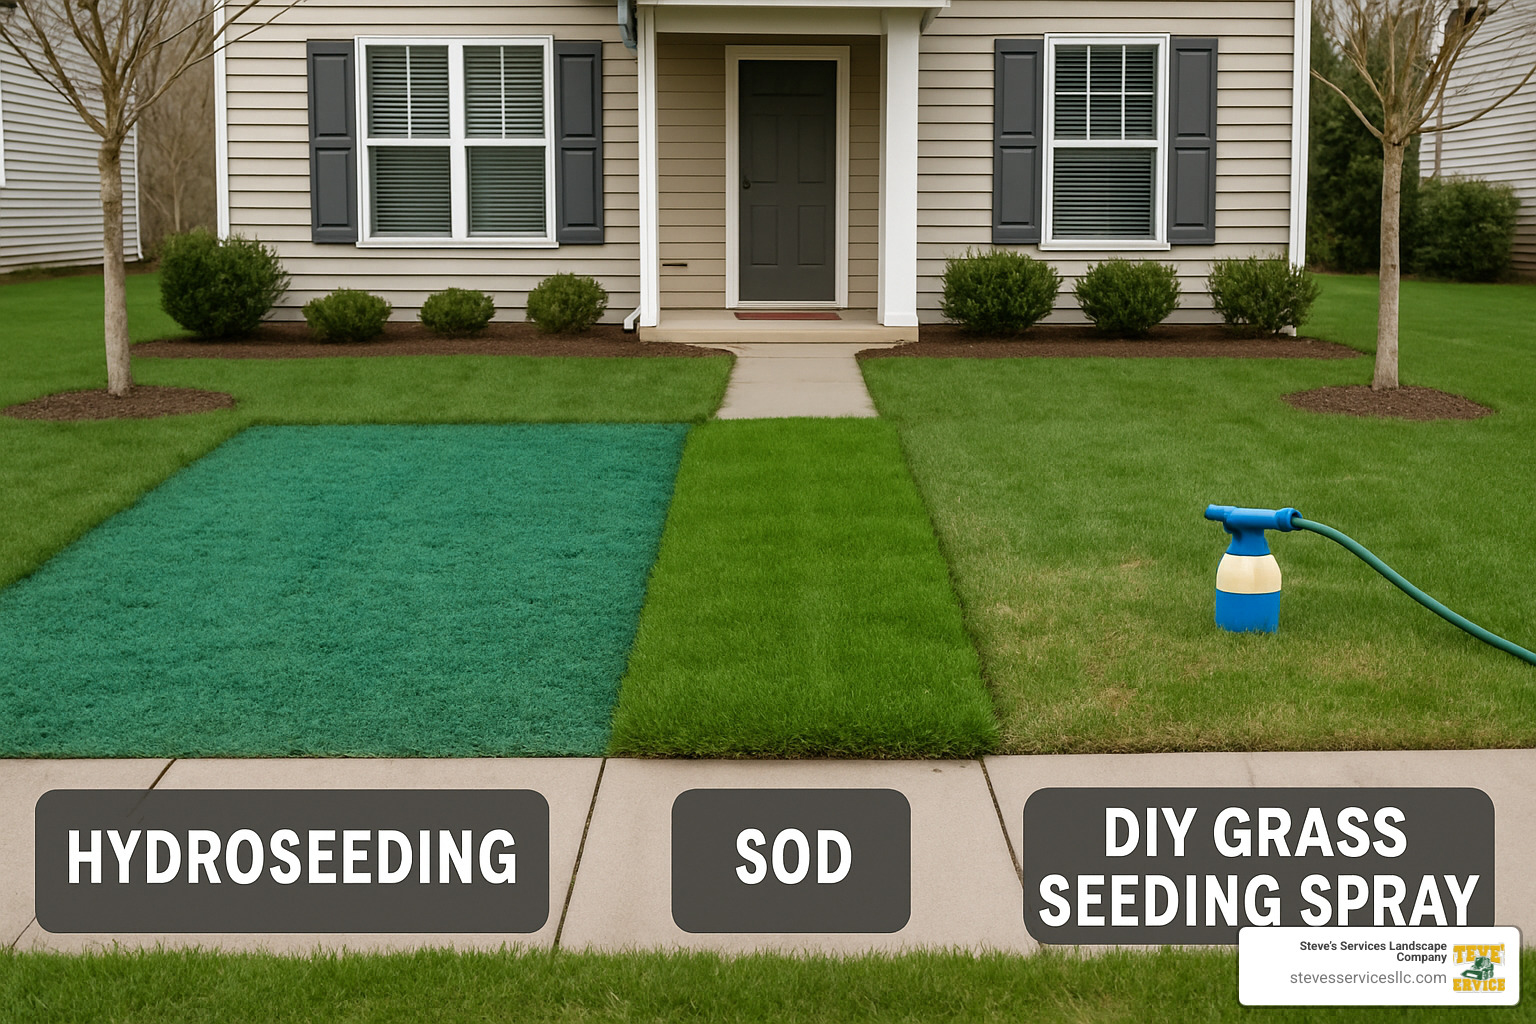
Commercial Hydroseeding vs. Traditional Sod
Many homeowners find themselves torn between hydroseeding and sod when establishing a new lawn. Here’s the real talk about both options:
Hydroseeding creates a lawn that truly belongs in your yard. The seeds germinate in your native soil, developing deep, strong root systems that adapt to your specific conditions. It costs about 75% less than sod (averaging $0.06-$0.20 per square foot based on internet data, not our rates), but requires some patience—you’ll see germination in 7-14 days and a mowable lawn in about 3-4 weeks.
Sod delivers that instant gratification factor—roll it out and you have a lawn today. It’s particularly valuable when you need immediate erosion control or have an event coming up. However, it comes with a premium price tag ($1.50-$3.00 per square foot) and sometimes struggles to develop deep roots in New England’s clay-heavy soils. Your variety options are also more limited compared to hydroseeding.
In my experience working with hundreds of Massachusetts properties, hydroseeded lawns typically outperform sod over the long term, developing better drought resistance and requiring less water once established. For more information about professional hydroseeding, check out What is Hydroseeding?
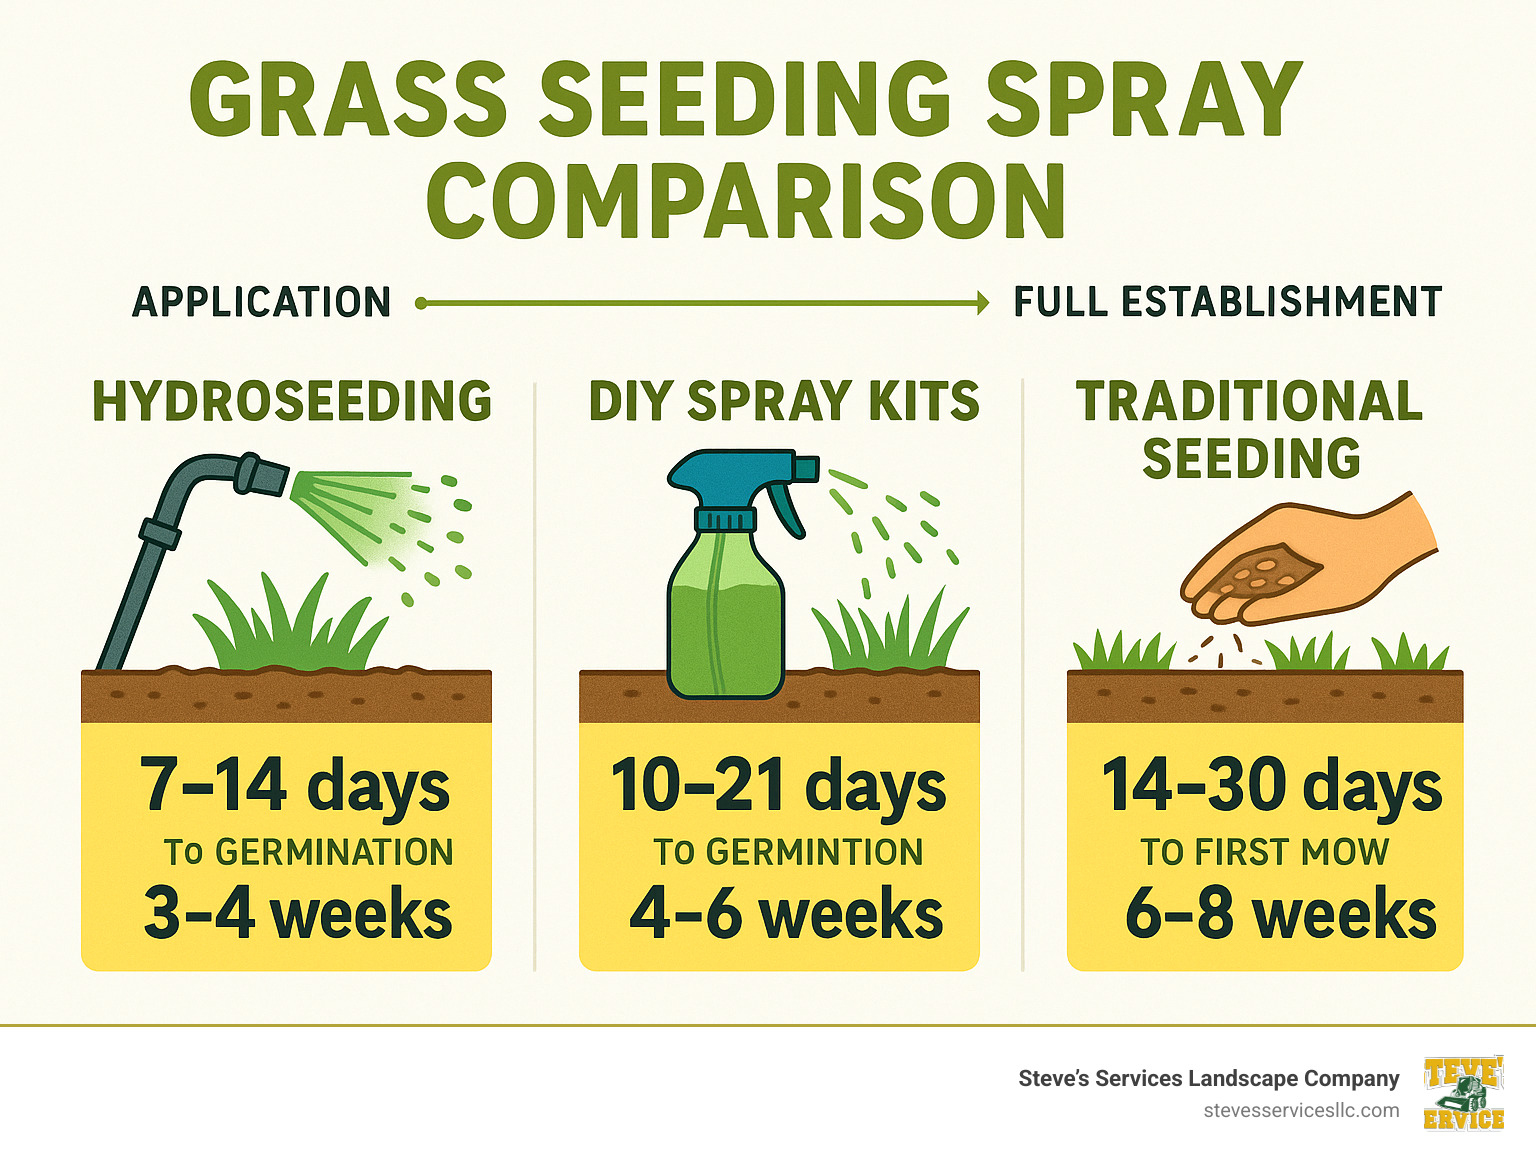
Performance Showdown: Coverage, Cost & Speed
Let’s talk about what really matters when you’re choosing how to establish your lawn – the three big factors that most homeowners care about: how much area you can cover, what it’s going to cost you, and how quickly you’ll see that beautiful green carpet.
When you’re standing in your yard, staring at bare soil, every day without grass feels like an eternity. That’s why understanding the timeline and costs upfront helps set realistic expectations. I’ve broken down how the different approaches compare:
| Method | Coverage Rate | Cost Range* | Germination Time | Full Establishment |
|---|---|---|---|---|
| Professional Hydroseeding | 5,000+ sq ft quickly | $0.06-$0.20/sq ft | 5-7 days | 4-8 weeks |
| DIY Spray Kits | 100-500 sq ft per kit | $0.15-$0.60/sq ft | 7-14 days | 6-10 weeks |
| Traditional Seeding | Varies by method | $0.03-$0.10/sq ft | 14-30 days | 8-12 weeks |
| Sod | Limited by labor | $1.50-$3.00/sq ft | Instant green | 2-3 weeks to root |
*Cost ranges based on internet data, not Steve’s Services rates
Average Price Ranges (Not Steve’s Rates)
I’ve researched typical costs across the industry (these aren’t Steve’s Services prices), and here’s what you might expect to pay for different lawn establishment methods:
Professional grass seeding spray through hydroseeding typically runs between $0.06-$0.20 per square foot. For a typical yard, that translates to around $1,000. It’s the sweet spot between affordability and professional results.
Those DIY spray kits you see at home improvement stores? They’ll set you back about $19.95-$79.80 per kit, covering just 100-500 square feet. When you do the math, that works out to $0.15-$0.60 per square foot – potentially more expensive than professional services for larger areas!
Traditional seeding is the budget option at $0.03-$0.10 per square foot for materials, but remember you’re trading money for time and potentially less consistent results.
Sod gives you instant gratification but at a premium price: $1.50-$3.00 per square foot. That means a modest 5,000 square foot lawn could cost between $7,500-$15,000 for sod, compared to just $300-$1,000 for professional hydroseeding based on these internet averages.
Key Growth Milestones
When you choose a grass seeding spray approach, your lawn develops in predictable stages. I love watching this change with my clients – it’s like watching a time-lapse in real life:
During the first 5 days, your lawn will look green – but that’s just the dye in the mulch layer showing you where we’ve sprayed. Don’t be fooled! The real magic is happening underground as seeds absorb moisture and begin to sprout.
Between days 5-10, you’ll spot those first delicate sprouts poking through. This happens faster with professional hydroseeding than other methods, which is why I’m such a fan of this approach.
By days 14-21, your lawn begins taking on that coveted green appearance from a distance. It’s still fragile, but you can start to see the promise of what’s coming.
Around weeks 3-4, your new grass will reach 3-4 inches tall, ready for its first gentle mowing. This is a milestone moment for any homeowner!
Finally, at weeks 8-10, with proper care, your lawn should be fully established. The waiting pays off with a lush, healthy turf that will be the envy of the neighborhood.
That Mother Nature has a big say in this timeline. Here in Massachusetts, we see the fastest and most consistent results with fall applications (late August through September). The combination of warm soil, cooler air temperatures, and typically reliable rainfall creates perfect growing conditions. Plus, there’s less competition from weeds, giving your new grass the best chance to thrive before winter sets in.
Application & After-Care Best Practices
The magic of grass seeding spray doesn’t end when you finish spraying. In fact, what you do before and after application often determines whether you’ll be admiring lush green grass or scratching your head over patchy results. Let me share what I’ve learned from years of helping Massachusetts homeowners transform their lawns.
Before Application:
Proper preparation creates the foundation for success. Think of it like painting a wall—skipping the prep work always leads to disappointing results. Before reaching for that grass seeding spray, make sure your soil is truly ready.
Start by testing your soil’s pH level, aiming for that sweet spot between 6.0 and 7.0 that most grass varieties love. Next, give your yard a good cleaning by removing sticks, rocks, and dead grass that might prevent seed-to-soil contact.
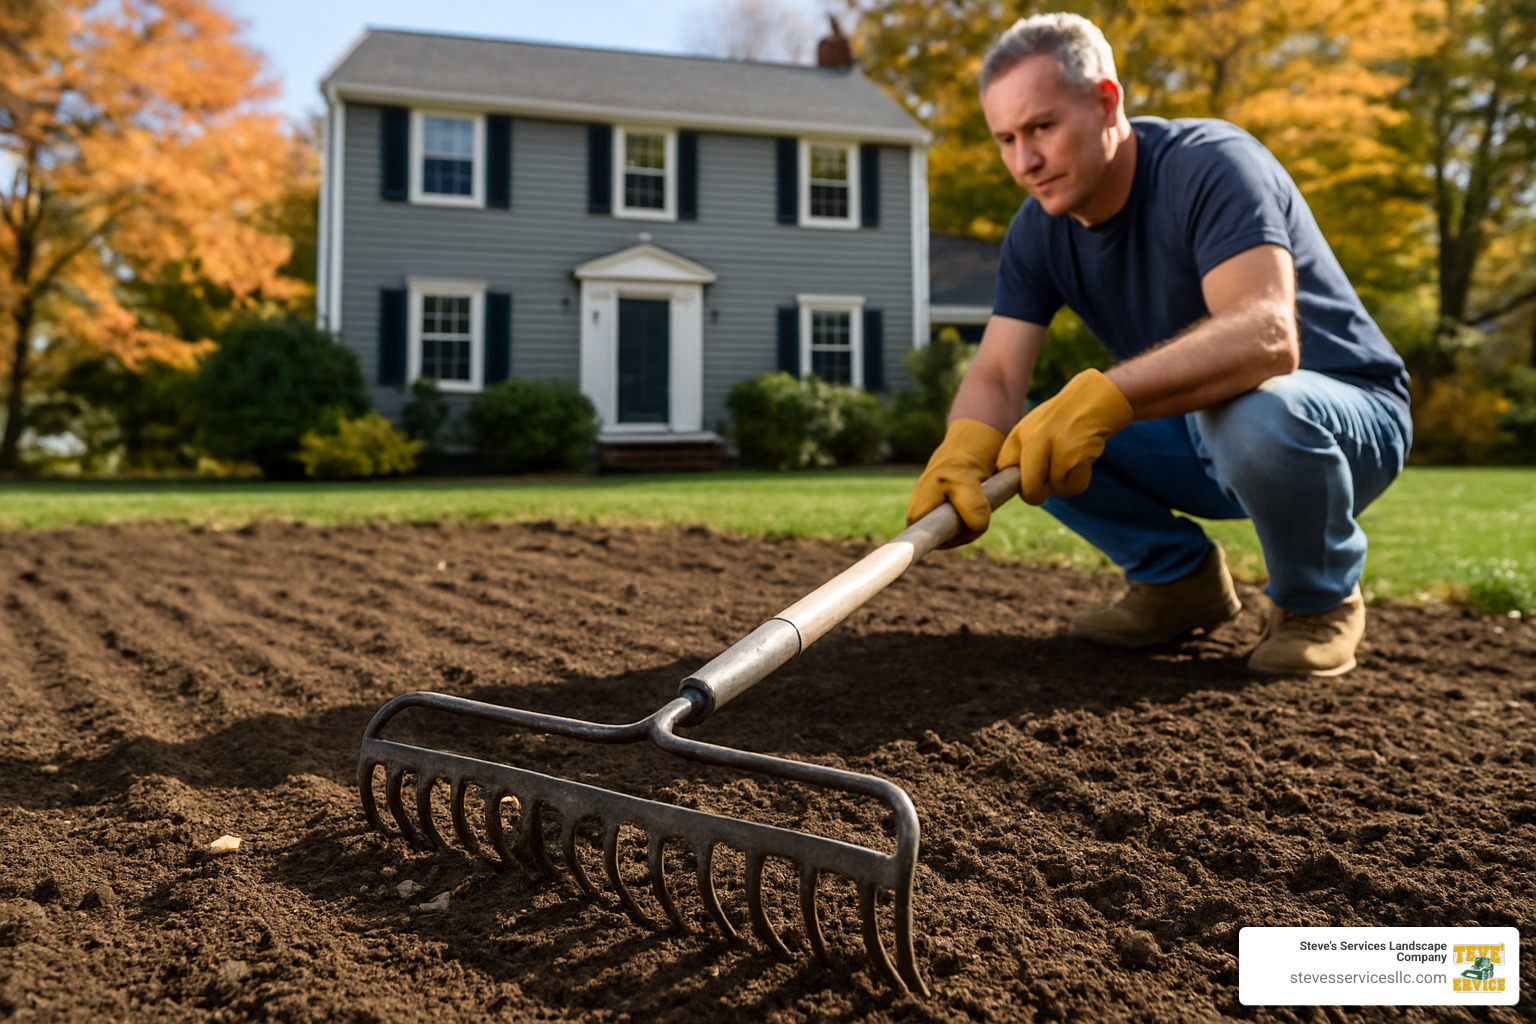
Don’t underestimate the importance of loosening compacted soil with a rake or aerator—your seeds need to nestle into the soil, not sit on top of it. Proper grading is another crucial step that many homeowners overlook. Water should always flow away from your home’s foundation, not toward it. Finally, give your soil a light misting before application—damp soil helps the spray mixture adhere better.
If you’re using a DIY kit, I always recommend practicing your spray technique with plain water first. It’s like learning to use a paint sprayer—a little practice prevents those embarrassing uneven patches later. For larger areas or challenging conditions like steep slopes, professional hydroseeding typically delivers more consistent results.
Watering Schedule for Success
I can’t stress this enough: watering is where most grass seeding spray applications succeed or fail. The goal isn’t just to water, but to maintain consistent moisture in that mulch layer until your seeds have fully germinated.
During the first two weeks, you’ll need to be diligent with watering 2-3 times daily for about 5-10 minutes each session. I recommend early morning and late afternoon as ideal times. You’re aiming for consistent moisture without creating puddles or runoff. Even after a light rain, don’t skip your regular watering—rainfall is rarely as thorough as you might think.
As you enter weeks 3-4, you can dial back to once-daily watering but increase the duration. This encourages deeper root development as your grass becomes established. Keep an eye out for dry spots that might need extra attention with hand watering.
After the one-month mark, you can transition to a normal lawn watering schedule of deep watering 1-2 times weekly, aiming for about an inch of water total. This deeper, less frequent watering pattern trains your grass roots to grow deeper, creating a more drought-resistant lawn.
Here in Massachusetts, our seasonal patterns require adjustments. Spring applications might need less frequent watering thanks to natural rainfall, while summer applications demand vigilant moisture monitoring to prevent drying out. For more detailed guidance, check out our comprehensive guide on How to Care for Lawn After Hydroseeding.
Avoiding Common Pitfalls
After helping countless homeowners throughout Burlington, Danvers, Everett, and other Massachusetts communities, I’ve seen the same mistakes trip people up time and again with their grass seeding spray projects.
Foot traffic is a major culprit—those tender seedlings need at least 4 weeks without being trampled. It’s hard to keep kids and pets off newly seeded areas, but temporary fencing or stakes with string can work wonders as visual reminders.
Both overwatering and underwatering can doom your efforts, though underwatering remains the #1 cause of seeding failure I see. Overwatering creates fungal issues and encourages shallow root systems, while underwatering simply kills your seedlings before they can establish.
Patience matters too—mowing too soon can pull young grass plants right out of the soil. Wait until your grass reaches a consistent 3-4 inches height before that first trim. Similarly, hold off on weed control products for at least 6-8 weeks, as most will harm your delicate new grass.
For those using DIY kits, watch out for sprayer clogging. The seeds can sometimes clump in the applicator, leading to frustrating uneven distribution. Following the manufacturer’s instructions precisely isn’t just recommended—it’s essential for success.
The effort you put into proper application and aftercare will be rewarded many times over when you’re enjoying that lush, healthy lawn. And remember, if the process seems overwhelming, our team at Steve’s Services is always here to help with professional hydroseeding services that take the guesswork out of establishing your perfect lawn.
Common Problems & Troubleshooting
Let’s face it – even with perfect application, grass seeding spray projects sometimes hit a few bumps in the road. After helping hundreds of Massachusetts homeowners transform their lawns, I’ve seen just about every challenge that can pop up. Here’s what you might encounter and how to fix it:
Uneven Growth Patterns
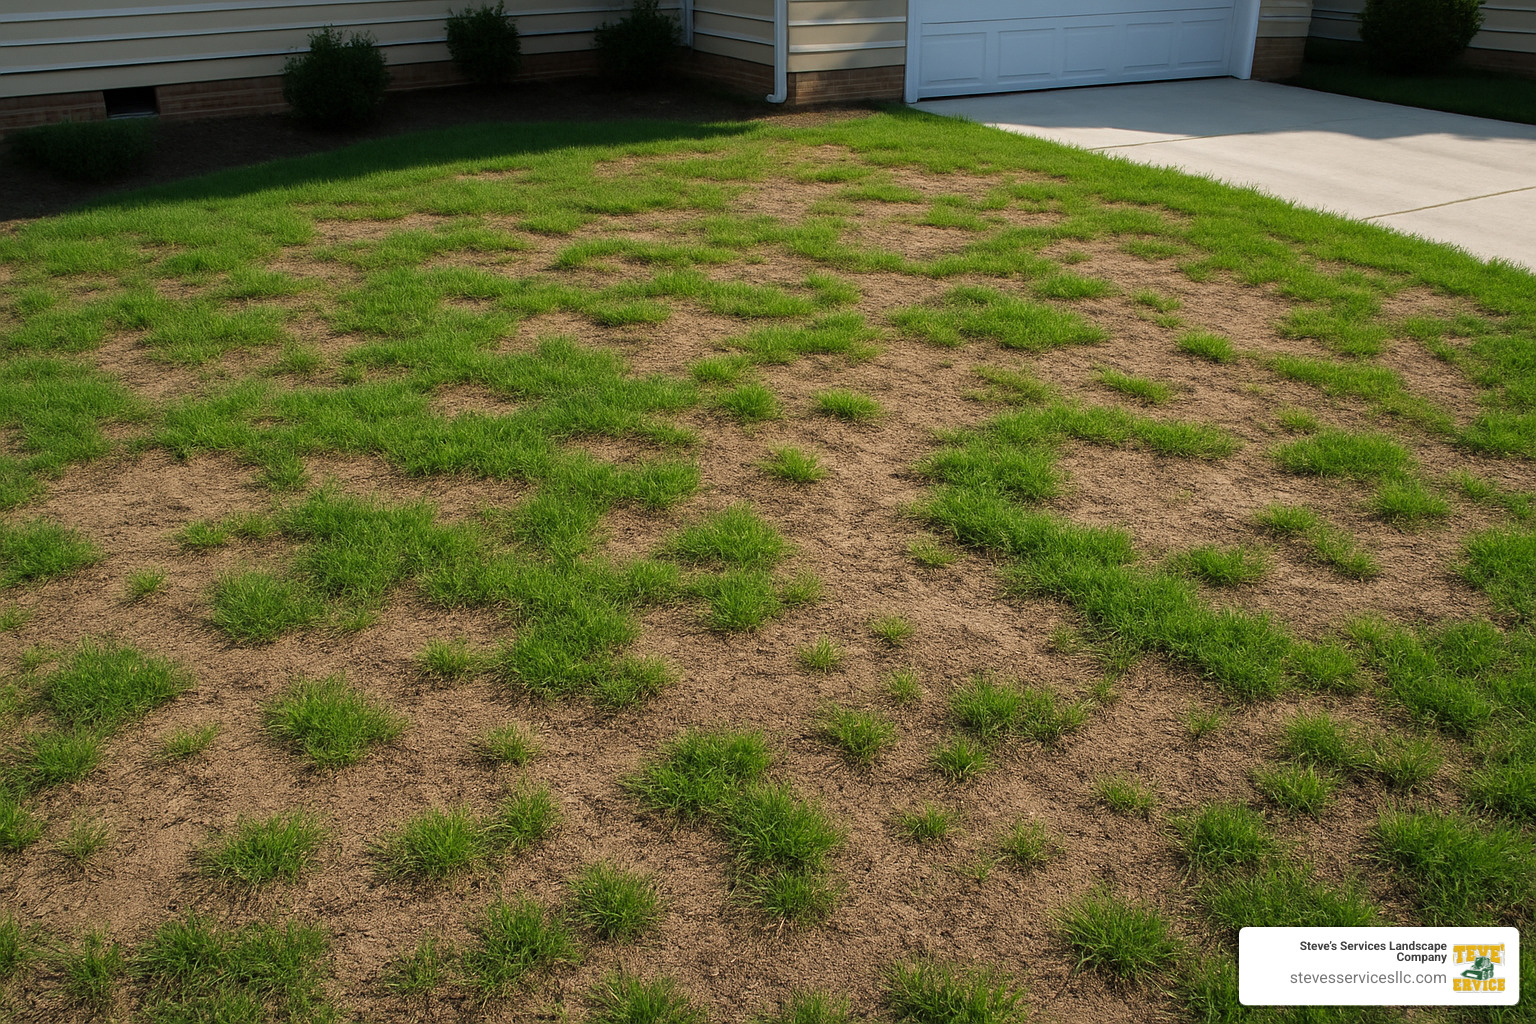
There’s nothing more frustrating than watching your lawn come in with patchy results – some areas lush and green while others remain stubbornly bare.
This typically happens because of inconsistent spray application (especially with DIY kits), varying soil conditions across your yard, or water runoff that carries seeds downhill. Sometimes the seeds simply settle in low spots, creating thicker growth in some areas.
The good news? This is fixable. For thin areas, a second light application can work wonders. If you’ve got completely bare patches, hand-seeding those specific spots often does the trick. Also check your sprinkler coverage – uneven watering is often the culprit behind uneven growth.
Before doing any reapplication, take a moment to address any drainage issues. Water that pools or runs off too quickly will continue causing problems no matter how many times you reseed.
Staining Concerns
“Will this green stuff stain my driveway?” is probably the most common question I hear before a grass seeding spray application. The dye in these products can indeed temporarily stain concrete, siding, and other surfaces – but it’s rarely permanent.
While the color typically washes away with a few good rainfalls, you can take some simple precautions. Use cardboard barriers when spraying near your patio or walkways. If you do get overspray on surfaces, rinse immediately with water. For extra protection, apply a thin layer of petroleum jelly to edges of surfaces you want to protect before spraying.
DIY kit users should be particularly careful around hardscapes. The spray pattern from a garden hose attachment is much less controlled than professional hydroseeding equipment, making it easier to accidentally spray your deck or siding.
When to Re-Spray the Area
Sometimes your lawn needs a second chance. In my experience, you should consider reapplying your grass seeding spray if:
Heavy rain washed away your initial application before the seeds could take root. Those Massachusetts spring downpours can be brutal on fresh seed!
After 21 days, less than 60% of your yard has sprouted. This suggests something went wrong with the first application.
Large bare patches remain after a full month, despite good watering practices.
A drought hit right after your application, compromising seed germination despite your best watering efforts.
With DIY spray kits, I’ve found that a second application is often needed for best results, especially in challenging areas like slopes or heavily shaded spots. The thinner application these products provide sometimes isn’t enough for one-and-done success.
Is It Safe for Kids, Pets & Environment?
As a father and pet owner myself, I completely understand the safety concerns around any lawn treatment. Fortunately, most grass seeding spray products are relatively environmentally friendly.
The seeds are obviously natural and safe. The mulch component is typically made from recycled paper or wood fiber that’s completely biodegradable. The fertilizer contains basic N-P-K nutrients in modest amounts – nothing exotic or dangerous. The green dye that makes application visible is usually a non-toxic vegetable-based colorant. Even the tackifier (the sticky stuff that holds everything in place) is typically natural guar gum or plant-based adhesives.
Professional hydroseeding mixtures can be customized to be even more eco-friendly. At Steve’s Services, we often use organic fertilizers and all-natural components when clients request them.
For maximum safety, I recommend keeping pets and children off newly seeded areas for 24-48 hours after application. This isn’t because of toxicity concerns – it’s primarily to protect the seeds and give them a chance to settle in without disturbance.
Frequently Asked Questions about Grass Seeding Sprays
How long until I see green?
One of the most common questions I hear from homeowners is about timing – everyone wants to know when they’ll start seeing results! With professional hydroseeding, you might spot those first tiny sprouts in just 5-7 days if conditions are perfect. The DIY grass seeding spray kits typically take a bit longer, usually 7-14 days before you’ll notice initial germination.
Remember though, the journey to a lush lawn happens in stages. That initial green you see right after application? That’s just the dye, which fades within days. The real change follows a predictable pattern: first come those scattered baby sprouts, then around the two-week mark, you’ll start seeing enough coverage to appear green from a distance. With proper care, you’ll be looking at that picture-perfect lawn in about 6-8 weeks.
Here in Massachusetts, I’ve found that fall applications almost always show faster results than spring or summer seedings. The combination of warm soil, cooler air temperatures, and typically reliable rainfall creates the perfect growing environment.
Can I use a grass seeding spray on clay or sandy soils?
Absolutely you can – but a little preparation goes a long way toward success on these challenging soil types.
For clay soils, the dense, compacted nature can make it tough for new grass to establish strong roots. I recommend working some quality compost into the top layer before application to improve drainage. The good news is that professional hydroseeding can actually include soil conditioners right in the mix, giving your seeds a better chance from day one. While you might see slightly slower initial growth in clay, the moisture-retaining properties can lead to excellent long-term results.
Sandy soil presents the opposite challenge – it drains too quickly. The mulch component in grass seeding spray is actually a huge benefit here, acting like a sponge to hold moisture near the seeds. Adding compost helps sandy soil retain both water and nutrients. You’ll likely need to adjust your watering schedule too – more frequent but lighter waterings work best.
This is one area where professional hydroseeding really shines. We can customize the slurry with specific amendments for your particular soil conditions, giving your new lawn the best possible start.
What season is best for spraying in New England?
After 25 years of establishing lawns throughout Massachusetts, I can tell you with confidence that timing makes an enormous difference in our region.
Early fall is the golden period for grass seeding spray applications in New England. That late August to September window gives you warm soil temperatures (which speed germination) combined with cooler air temperatures (which reduce stress on seedlings). You’ll face less competition from weeds, and Mother Nature often provides perfect gentle rainfall patterns. This timing also gives your grass plenty of time to establish before winter arrives.
Early spring (April to early May) runs a respectable second place. The natural rainfall patterns help keep everything moist, and moderate temperatures create good growing conditions. The main drawback is increased weed competition.
I strongly advise against summer applications unless you’re prepared for vigilant watering and weed control. Late fall applications can be risky too – if we get an early cold snap, your grass might not establish properly before winter. And winter applications? Save your money and wait for spring.
For most properties across Burlington, Danvers, Everett, Lynnfield and our other Massachusetts service areas, that early fall sweet spot consistently delivers the best results with the least amount of maintenance headaches.
Conclusion
The verdict is in after years of testing grass seeding spray across countless Massachusetts properties: this technology delivers real results, but understanding its strengths and limitations is key to success.
Professional hydroseeding stands out as the clear winner for establishing new lawns or tackling major renovation projects. There’s something almost magical about watching a custom blend of seeds, premium mulch, and targeted nutrients transform bare soil into lush green grass in a fraction of the time traditional methods require.
For homeowners looking to patch small trouble spots, DIY grass seeding spray kits can be your weekend warrior solution. While they won’t quite match professional results for whole-lawn applications, they offer a convenient fix for those annoying bare patches that seem to appear each spring.
After working with Massachusetts homeowners from Burlington to Lynnfield, we’ve developed some straightforward recommendations:
When establishing an entire lawn, professional hydroseeding gives you the best bang for your buck. The even coverage, custom seed selection, and expert application create ideal growing conditions that simply can’t be matched with DIY approaches.
For those pesky bare spots under the swing set or where the dog has worn paths, DIY kits can work wonders when applied with care. Just remember that even the best technology needs proper preparation and follow-through.
And yes, if you absolutely need instant results for that weekend party, sod remains the only truly immediate solution – though your wallet will certainly feel the difference!
One truth we’ve learned time and again: the method of seeding is only part of the equation. Even the most advanced grass seeding spray technology can’t overcome poor soil preparation or inconsistent watering. The fundamentals still matter tremendously.
At Steve’s Services Landscape Company, we’ve helped countless homeowners throughout Massachusetts achieve the green, healthy lawns they’ve been dreaming of. Our team brings decades of experience to every project, whether we’re hydroseeding a brand-new property or guiding you through the best DIY solutions for your specific challenges.
While the promise of “spray-on perfect lawn” might sound too good to be true, the reality is that grass seeding spray technology, when properly applied, truly can transform your landscape more efficiently than traditional methods. Just bring a little patience – Mother Nature still needs her time to work her magic, even with our help speeding things along.
More info about local hydroseeding services
