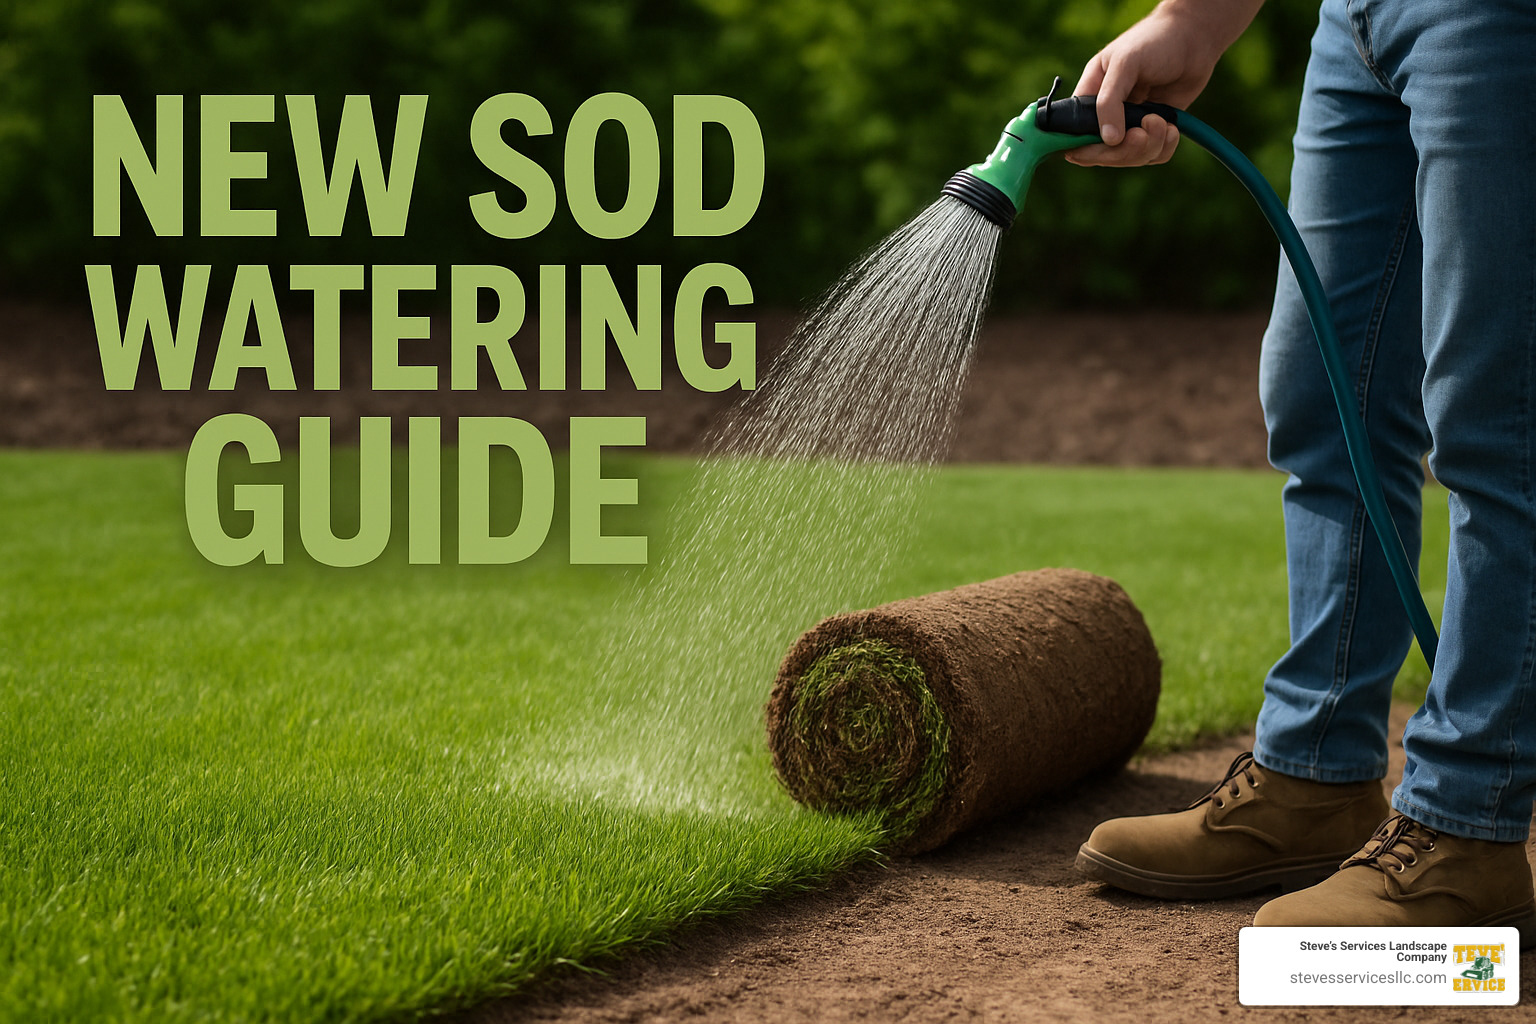
New sod watering guide: 7 Powerful Tips for Success 2025
The Critical First Month: Watering Your Fresh Sod
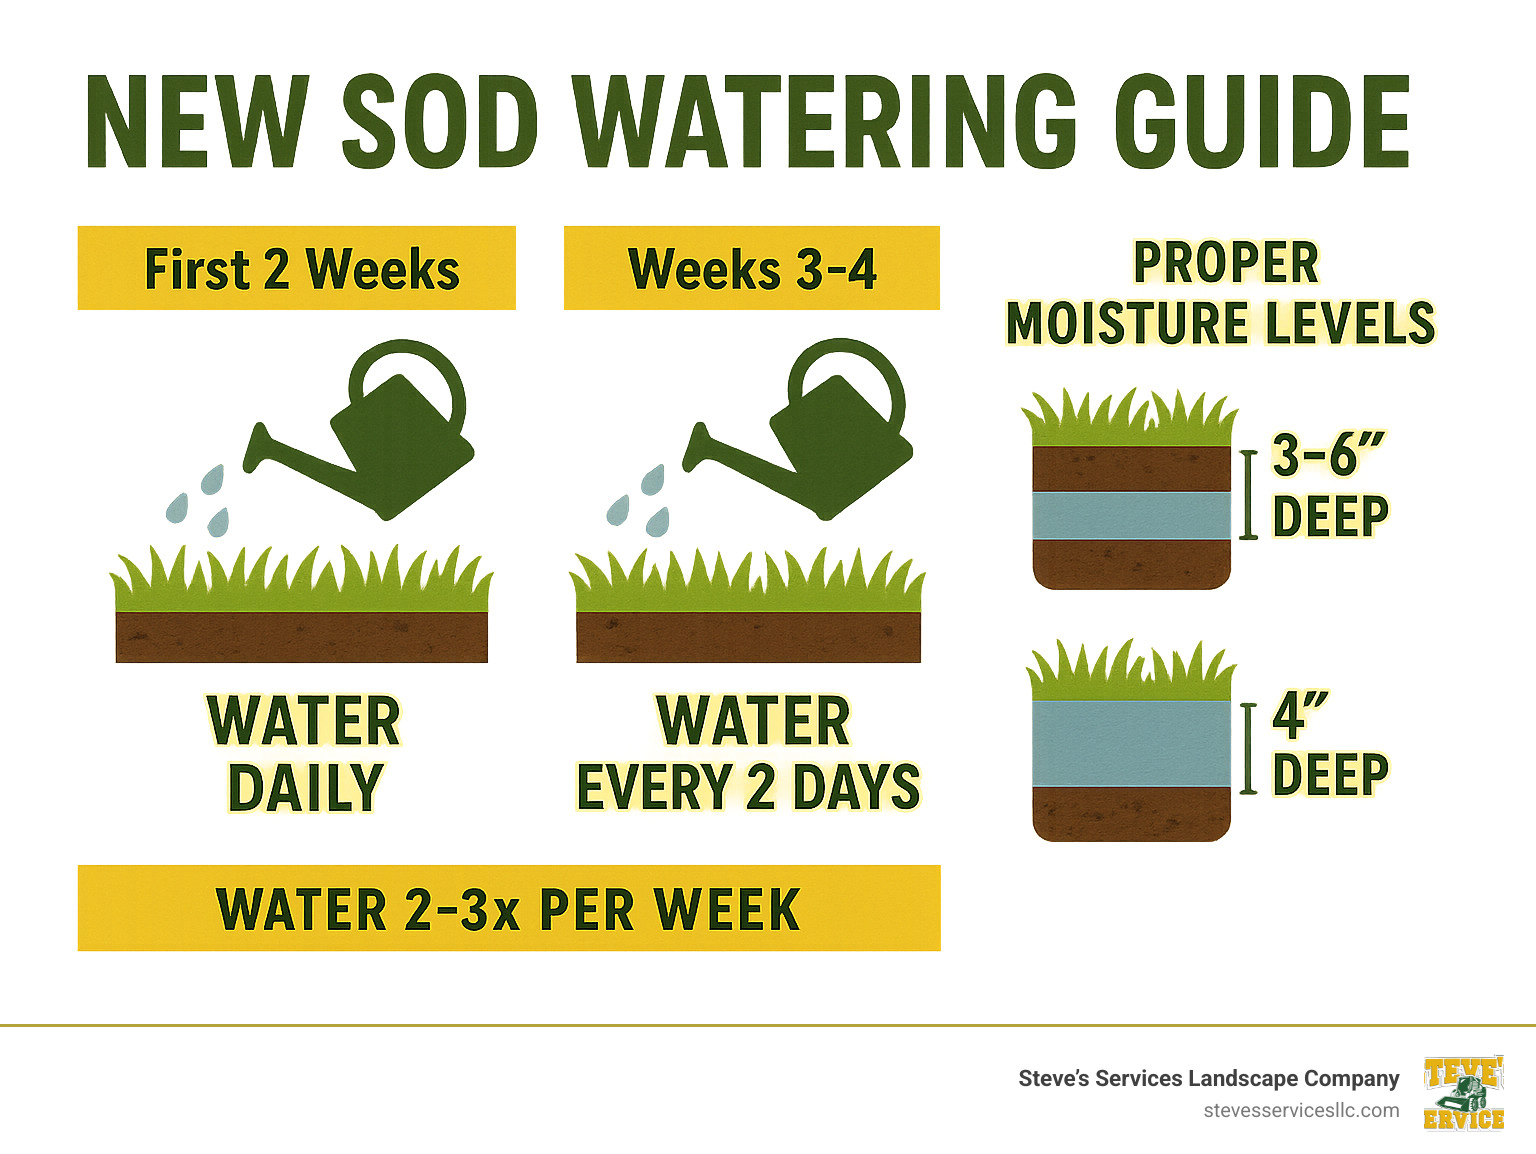
Looking for a quick new sod watering guide? Here’s what you need to know:
| Timeline | Watering Frequency | Amount | Key Points |
|---|---|---|---|
| Installation Day | Once | 45-60 minutes, soak 3-6″ deep | Ensure soil contact |
| Week 1 | 2-4 times daily | 1-2″ total per day | Morning watering best |
| Week 2 | 2-3 times daily | 1-1.5″ total per day | Check edges & seams |
| Weeks 3-4 | Every other day | 1-1.5″ per week | Soil should be moist 4″ deep |
| After 30 days | 2-3 times weekly | 1-1.5″ per week | Deep, infrequent watering |
A new sod watering guide is the most critical tool for ensuring your landscape investment thrives. That fresh green carpet you’ve just had installed requires special care during its first 30 days to develop strong roots and become the lush, healthy lawn you envision. Unlike established turf, new sod has shallow roots that can’t access deep soil moisture, making proper watering your #1 priority.
Think of your new sod as a patient in recovery. It’s undergone the trauma of being harvested, transported, and transplanted. Now it needs the right hydration schedule to heal and establish itself in its new home.
I’m Steve Sylva, owner of Steve’s Services, and with over 25 years of experience installing and maintaining lawns throughout Massachusetts, I’ve developed a comprehensive new sod watering guide that has helped countless homeowners transform their properties into vibrant, resilient landscapes.
New sod watering guide basics:
– Best fertilizer for new sod
– Caring for new sod
– How to fertilize new sod
If you’d like a deeper dive into the science behind turf itself, the overview of turfgrass cultivation on Wikipedia is a handy primer you can explore between watering cycles.
Why Proper Watering Is Critical in the First 24 Hours
Those first 24 hours after your sod installation? They’re make-or-break time for your new lawn. Think of your fresh sod as a patient in recovery—it needs immediate attention to heal and thrive in its new home.
When we lay sod at a client’s home in Everett or surrounding areas, I always emphasize that proper watering right away isn’t just helpful—it’s absolutely essential. Here’s why that initial watering matters so much:
Your new sod’s root system has been trimmed to just about an inch during harvesting. These shortened roots are desperately seeking moisture to kickstart their growth into your soil. Without immediate hydration, they simply can’t establish themselves.
The sod has also experienced what we call “transplant shock”—the stress of being cut, rolled, transported, and then unrolled in a completely new environment. Proper watering helps your grass recover from this traumatic experience.
Water also acts as nature’s glue, creating that crucial bond between your sod and the soil beneath. This soil-sod contact is non-negotiable for root development and nutrient absorption. When water soaks through the sod and into the soil, it creates the perfect environment for those roots to penetrate downward.
Plus, with adequate moisture, your grass can continue photosynthesizing without missing a beat, maintaining its energy reserves for the important work of root development.
| Factor | New Sod | Established Lawn |
|---|---|---|
| Root Depth | 1-2 inches initially | 4-6 inches or more |
| Daily Water Needs (First 2 Weeks) | 1-2 inches | 0.25 inches |
| Watering Frequency | 2-4 times daily | 2-3 times weekly |
| Moisture Depth | Top 3-4 inches | 4-6 inches |
| Recovery Ability | Limited | Robust |
As this comparison shows, your new sod is much needier than an established lawn. It’s like comparing a newborn to a teenager—one needs constant attention while the other is pretty self-sufficient!
New sod watering guide: Day-One Checklist
Ready to give your new sod the best possible start? Here’s your day-one game plan:
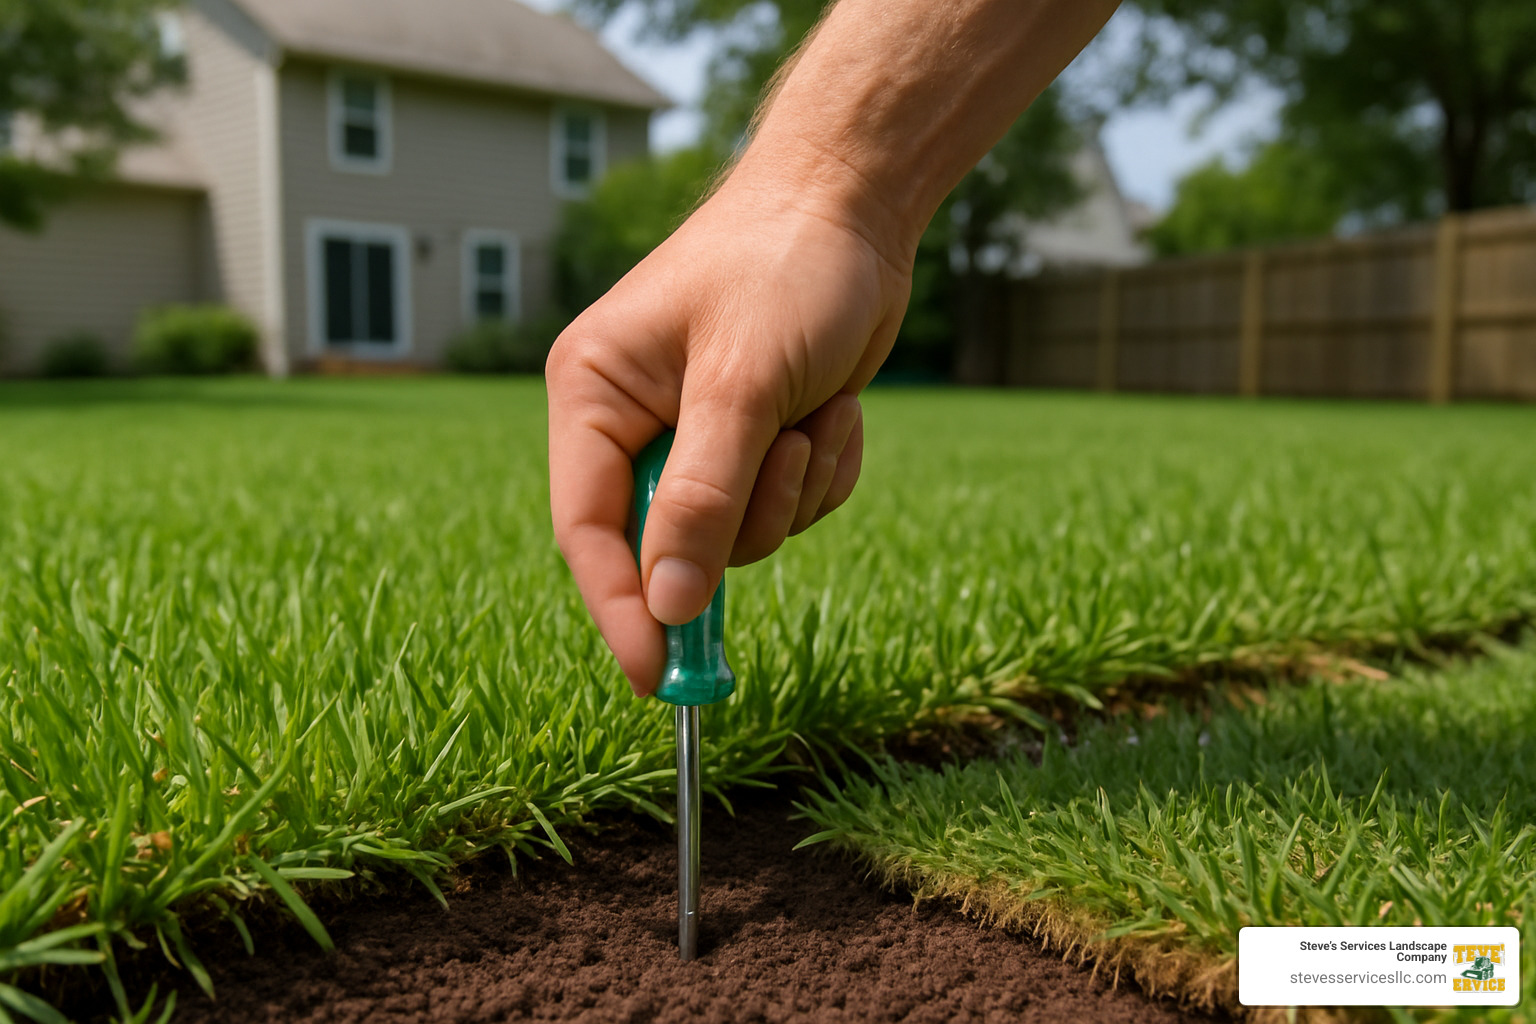
Right after installation, give your lawn a generous 45-60 minute continuous soaking. This isn’t overdoing it—it’s exactly what your sod needs to push moisture 3-6 inches into the underlying soil. After this initial watering, grab a screwdriver or soil probe and check how deep the moisture has penetrated. The tool should slide easily 3-6 inches into the soil. If there’s resistance, keep watering.
Pay extra attention to edges and seams between sod pieces—these vulnerable areas dry out faster than the centers and often need additional hand-watering. If you notice water starting to pool or run off (especially common on slopes or clay soils), pause for 15-30 minutes to let the water absorb, then continue.
“In my 25 years installing sod across Massachusetts, the biggest mistake I see homeowners make is underwatering on day one,” says Steve Sylva, owner of Steve’s Services. “Folks worry about drowning their new lawn, but in those critical first 24 hours, that deep soak is absolutely essential for root establishment.”
This initial watering sets the stage for everything that follows. Get it right, and you’re well on your way to a lush, healthy lawn that will be the envy of your neighborhood.
Weeks 1–2: Build Moisture, Not Mush
During the first two weeks, your new sod watering guide focuses on consistent moisture without creating waterlogged conditions. This is the most labor-intensive period of sod establishment, but trust me—your diligence now will reward you with a healthy, vibrant lawn for years to come.
Think of your new sod like a newborn baby—it needs frequent attention and can’t yet fend for itself. Your goal is maintaining that sweet spot of consistent moisture without turning your yard into a swamp. Here in Massachusetts, where summer can bring unexpected heat waves, staying vigilant is especially important.
You’ll want to water 2-4 times per day, with the number depending on temperature, humidity, and wind conditions. When the thermometer climbs into the 90s (which happens more often than we’d like in Boston suburbs!), you’ll definitely need all four sessions. Spread these watering times throughout the day, with your most important session in the early morning between 5-8 AM for about 15-20 minutes. This gives the water time to soak in before the sun starts baking everything.
If possible, add mid-morning (10-11 AM), early afternoon (1-2 PM), and late afternoon (4-5 PM) sessions of similar length. Your total daily goal is 1-2 inches of water, divided among these sessions. And if your schedule only allows for two waterings, prioritize that early morning session and add an early afternoon one.
“I always tell my Melrose and Stoneham clients that consistency beats quantity,” says Steve Sylva, our founder. “Four lighter waterings spread throughout the day beats one heavy soaking that might just run off.”
Pay special attention to edges and corners—these troublemakers dry out faster than the rest of your lawn. Areas near driveways, sidewalks, or buildings are particularly vulnerable since concrete and asphalt radiate heat. You might need to hand-water these spots between your regular sprinkler sessions.
More info about Caring for New Sod
Signs You’re on Track
How do you know if your watering efforts are hitting the mark? Your lawn will tell you if you know what to look for.
First, watch for uniform color across your entire lawn. Patchy coloring often signals uneven watering. A healthy, well-watered lawn maintains a consistent green throughout the day.
The spring-back test is my personal favorite check. When you walk across your new sod, your footprints should disappear within a few minutes. If they linger longer, your grass is telling you it needs more water. Some depression is normal in the first week, but persistent footprints are a cry for help.
Around day 7-9, try the corner-lift check by gently lifting a corner of sod in an inconspicuous spot. You should see small white roots beginning to grow into the soil beneath. By day 14, these roots should be more numerous and longer—a great sign your lawn is establishing itself.
Perhaps most important is learning to recognize the blue-gray alert system. Before grass turns brown from drought stress (which means you’ve waited too long), it first takes on a subtle blue-gray tint. This color change is your early warning system—water immediately if you spot it.
New sod watering guide: Common Mistakes in Week 1
Even with the best intentions, it’s easy to slip up during this critical period. Here are the pitfalls I’ve seen most often in my 25 years of installing sod across Massachusetts:
Pooling water is a clear sign of overwatering. If your shoes make a squishing sound when you walk across the lawn, or you see standing water, reduce your watering time by 25-50%. Your sod needs to breathe too!
Evening watering might seem convenient, but it significantly increases the risk of fungal diseases. When grass stays wet overnight, fungi throw a party on your new lawn. Stick to morning and afternoon sessions to allow time for the surface to dry before nightfall.
Many homeowners underestimate hot-day needs. When temperatures soar above 90°F, especially with our Massachusetts humidity, you may need to add an extra watering cycle. New sod can dry out in just a few hours during heat waves.
Watch for visible seams between sod pieces—this is a telltale sign of underwatering. The sod is literally shrinking from moisture loss. If you notice gaps appearing, increase your watering immediately before the pieces curl at the edges.
Finally, inconsistent coverage from hand-watering often creates dry patches. Invest in a quality oscillating sprinkler for uniform coverage. Your back will thank you, and so will your lawn.
“The biggest issue we see with our Medford clients is forgetting the footprint test,” shares our service manager. “It’s such a simple check, but it tells you instantly if your watering schedule is on track.”
Weeks 3–4: Transition to Deep, Infrequent Soaks
By the beginning of week 3, you’ll notice your sod developing a stronger root system. This is when the magic happens – it’s time to shift gears in your new sod watering guide strategy. We’re moving from those frequent, shallow waterings to deeper, less frequent soaking sessions. This isn’t just a change in schedule; it’s encouraging your grass to send roots deeper into the soil, building drought resistance for the long Massachusetts summers ahead.
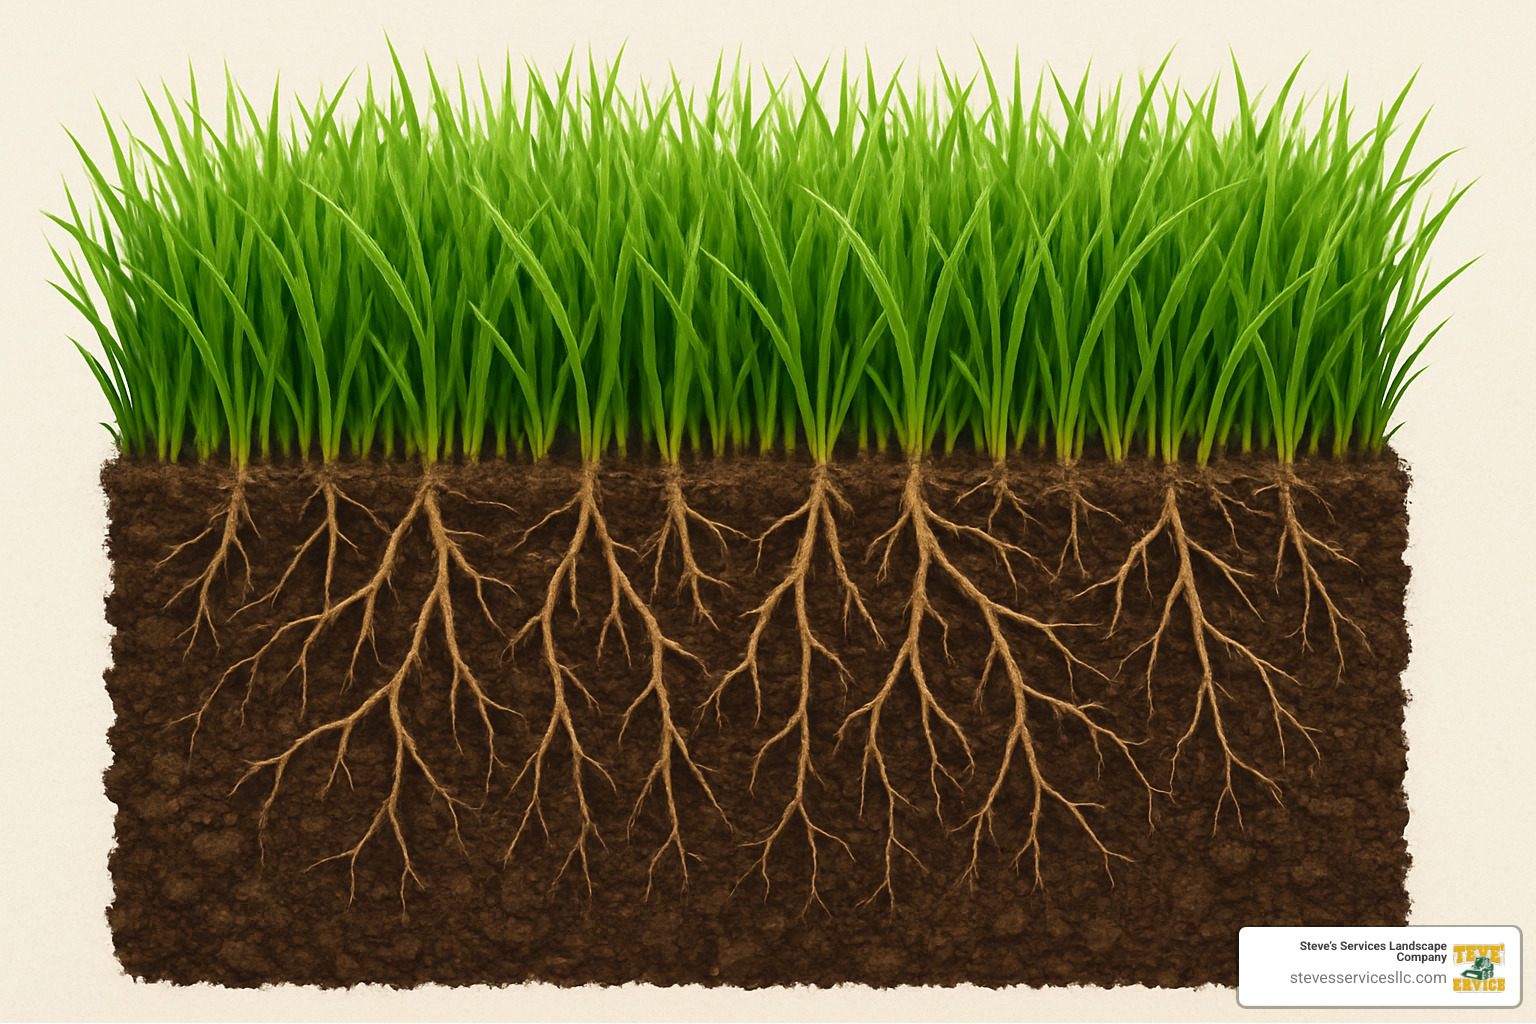
Your lawn is like a teenager now – still developing, but ready for a little more independence. Cut back to watering every other day or about 3-4 times weekly, but increase each session to 30-40 minutes per zone. You’re aiming for a total of 1-1.5 inches of water per week. This deeper watering should penetrate 4-6 inches into the soil, coaxing those roots to stretch downward.
Early mornings (5-8 AM) remain your best watering window for maximum absorption and minimal evaporation. And while your sod is getting stronger, it’s still not ready for the neighborhood soccer tournament – continue limiting heavy foot traffic, pet activities, and play until those roots are fully established.
“Many of our Everett homeowners feel nervous about watering less often,” says Steve. “But it’s like teaching a child to swim – at some point, you have to let go of the edge of the pool. Your grass needs to learn to reach for water rather than having it constantly delivered to the surface.”
By week 4, you should see your investment really taking hold, with roots extending several inches into your soil. Your lawn is on its way to becoming the envy of the neighborhood!
More info about How to Fertilize New Sod
First Mow & Fertilizer Timing
Around day 14, your grass will likely be ready for its first haircut. This milestone might make you a bit nervous, but with the right approach, it’s a breeze. Your sod is ready when it reaches about 3-4 inches tall, feels firmly rooted (it doesn’t lift when gently tugged), and the soil is firm enough to walk on without sinking in like quicksand.
Before you fire up the mower, ease back on watering for 24-48 hours. This firms up the soil so you’re not mowing through mud. Make sure your mower blades are sharp – dull blades tear grass rather than cut it cleanly, creating stress your young lawn doesn’t need. Set your mower to its highest setting, usually around 3-3.5 inches.
Remember the one-third rule that all professional landscapers swear by: never remove more than one-third of the grass height in a single mowing. This prevents shock to your new lawn. Try to mow when the grass is dry but not thirsty, and consider bagging the clippings just this first time to prevent smothering your young grass.
“I always tell our Malden and Medford customers to move quickly across new sod,” Steve shares with a chuckle. “This isn’t the time for leisurely mowing patterns or sharp turns that could tear up your new turf. If a piece shifts during mowing, press it back into place right away – it’s like tucking in a loose sheet.”
For fertilizing, patience pays off. Wait until about 3-4 weeks after installation, ideally after that first mow. Choose a starter fertilizer with higher phosphorus content, which encourages those roots to develop deeply. Water thoroughly afterward to prevent burning and help nutrients reach the root zone.
The weight of your mower matters too. A lighter push mower might be gentler than a heavy riding mower for this first cut. Your sod is like a new carpet – still settling into place and vulnerable to shifting until those roots really take hold.
Customizing for Weather, Soil & Grass Type
Let’s face it – your lawn isn’t living in a vacuum. Mother Nature throws all sorts of curveballs our way here in Massachusetts, from scorching summer days to unexpected downpours. That’s why your new sod watering guide needs some personalization based on what’s happening in your specific yard.
“I always tell our Melrose and Stoneham customers that their sprinkler system isn’t a ‘set it and forget it’ situation,” says Steve. “The best lawns come from homeowners who learn to read both their grass and the weather forecast.”
When temperatures climb above 85°F, your sod gets thirstier. Add an extra watering cycle, especially in the early morning when evaporation is lowest. During those brutal heat waves we sometimes get in July and August, you might even need a light afternoon misting to help your grass cope.
On the flip side, cooler days below 70°F mean your lawn needs about 25-30% less water. The grass simply isn’t losing as much moisture to evaporation, so cut back accordingly. Just keep an eye out for mushrooms or soggy soil – classic signs you’ve overdone it.
Rainy days are nature’s sprinkler system, but measuring matters. A good rain gauge is worth its weight in gold for any new sod watering guide. Generally, a half-inch of natural rainfall equals one watering session you can skip. Just be sure to check that your soil isn’t waterlogged before resuming your regular schedule.
Those breezy days we get off the Atlantic? They’re secretly drying out your lawn faster than you’d think. Wind dramatically accelerates evaporation, so try to water during the calmest part of the day and bump up your watering time by 10-15% when it’s gusty. The edges of your lawn will need extra attention on windy days.
Your soil type makes a huge difference too. Here in Massachusetts, we see everything from heavy clay to sandy loam, sometimes on the same property!
Clay soil is like a sponge that absorbs slowly but holds water longer. If you’ve got clay, shorter, more frequent watering sessions prevent runoff, and you can actually reduce your total water volume by about 15-20%. Sandy soil is just the opposite – it drains quickly and needs more frequent watering with about 15-20% more water overall. Loamy soil is the goldilocks of soil types, allowing you to follow standard guidelines with fewer adjustments.
Even your grass variety has specific needs. Kentucky Bluegrass is gorgeous but thirstier, while Fescue varieties can require 30-40% less water. Bermuda grass has excellent drought tolerance once established but needs full sun to thrive.
“For our North Reading and Lynnfield customers, we typically recommend fescue blends due to their lower water requirements and good performance in our Massachusetts climate,” notes our turf specialist.
Special features in your yard need special attention. Those sloped areas look beautiful but create watering challenges as water runs off before soaking in. Break up your watering into shorter, more frequent cycles for slopes, or consider hand-watering if necessary. Shaded areas under trees need about 30% less water than sunny spots but should be monitored separately to avoid moss development.
Smart irrigation controllers have been game-changers for many of our customers. They connect to local weather data and automatically adjust your watering schedule based on actual conditions. While they’re an investment upfront, they often pay for themselves in water savings and convenience, especially with the latest drought rules we occasionally face. For more information on current water use restrictions and smart watering practices, check out San Jose Water’s guide on water use restrictions.
Quick-Reference Adjustments
When conditions change suddenly, here’s how to adapt your new sod watering guide on the fly:
| Condition | Adjustment |
|---|---|
| Temperature > 90°F | Add one watering cycle |
| Clay soil | Reduce run time by 15-20% |
| Sandy soil | Increase run time by 15-20% |
| Rainfall ≥ ½ inch | Skip next scheduled watering |
| Windy day | Increase run time by 10-15% |
| Shaded area | Reduce run time by 30% |
| Slope/hill | Split into shorter, multiple cycles |
“The ability to adjust your watering based on real-time conditions is what separates a good lawn from a great one,” explains our irrigation specialist. “Especially in Woburn and Winchester, where soil conditions can vary significantly even within the same property.”
Being responsive to your lawn’s specific situation isn’t just good for your grass – it’s better for your water bill and the environment too. A little attention to these details makes all the difference between a lawn that merely survives and one that becomes the envy of your neighborhood.
Monitoring Moisture & Preventing Trouble
Keeping an eye on your lawn’s moisture level is like checking a baby’s diaper—you need to do it regularly to avoid problems! Let me walk you through how to become a moisture detective for your new sod.
When I visit customers in Reading or Stoneham, they often ask, “Steve, how do I know if I’m watering enough?” The answer lies in watching for these telltale signs of under-watering:
Your grass will actually send you distress signals before it turns brown. First, look for a blue-gray color shift—this is your lawn’s first cry for help. If you walk across your lawn and your footprints stay visible for more than a few minutes, that’s another red flag. You might also notice grass blades folding lengthwise (the lawn’s way of conserving moisture) or gaps appearing between sod pieces as they shrink from dehydration.
On the flip side, over-watering has its own warning signs: a squishy, spongy feel underfoot (like walking on a wet sponge), puddles that stick around after watering, or unwelcome mushrooms popping up. Yellow-green grass and water running off instead of soaking in are also signs you’re being too generous with hydration.
“I tell my Medford clients that finding the middle ground is like making the perfect cup of coffee—not too strong, not too weak,” says our irrigation specialist. “It takes practice, but you’ll get it right.”
Disease Watch
Water-related lawn diseases can crash your new sod party if you’re not careful:
Brown Patch creates circular brown areas with darker borders, usually from evening watering sessions that leave moisture sitting overnight. Pythium Blight appears as greasy, water-soaked patches with cottony growth in the morning dew—a sure sign of excessive moisture meeting high temperatures. Dollar Spot shows up as straw-colored spots about the size of a silver dollar when drought stress mingles with high humidity.
The good news? All these are preventable with proper watering habits. Water in the morning, maintain consistent moisture (not too much, not too little), and improve drainage if needed.
Simple Moisture Tests
My favorite moisture test is so simple, you probably have the tool in your kitchen drawer right now. The screwdriver probe test involves pushing a regular 6-8 inch screwdriver into your lawn in several spots. It should slide into properly moistened soil with moderate resistance—like cutting through room-temperature butter. If it barely penetrates, your soil is too dry. If it slides in like it’s going through pudding and comes out muddy, you’re overwatering.
The container gauge method is another homeowner favorite. Place an empty tuna can on your lawn during watering, then measure the depth of water collected. This tells you exactly how much water your sprinkler is delivering.
For a more direct approach, try the visual soil check by removing a small plug of sod and soil with a trowel. The soil should feel like a well-wrung sponge—moist but not dripping. While you’re looking, check for those little white roots developing into the soil—they’re signs your sod is establishing nicely.
“The screwdriver test is something we teach all our Revere and Saugus customers,” says our irrigation specialist. “It’s simple but incredibly effective at gauging soil moisture.”
More info about Best Fertilizer for New Sod
Tools That Make It Easy
You don’t need fancy equipment to keep your new sod properly watered, but a few basic tools can make the job much easier:
An oscillating sprinkler is perfect for medium-sized lawns, providing even coverage with adjustable width and length settings. For larger properties, rotor sprinkler heads apply water more slowly, reducing runoff and covering expansive areas efficiently.
A simple rain gauge is worth its weight in gold—it helps you measure natural rainfall so you can adjust your watering schedule accordingly. If you’re ready to level up, a soil moisture sensor takes the guesswork out completely by providing precise readings of soil moisture conditions.
“For our customers in Danvers and Wakefield, we often recommend a combination of quality oscillating sprinklers and simple rain gauges as a cost-effective solution,” notes our equipment specialist. “For larger properties, in-ground systems with moisture sensors provide the best results.”
Proper monitoring isn’t just about saving water—it’s about giving your new sod the best chance to transform into that lush, resilient lawn you’ve been dreaming about. With these simple tests and tools, you’ll be well on your way to moisture mastery.
Long-Term Maintenance After Establishment
Once your new sod has successfully passed the 30-day establishment period, you can breathe a little easier. Your lawn now requires less intensive care, but don’t be fooled—proper watering remains the cornerstone of long-term lawn health. Let’s look at how your new sod watering guide evolves for established turf.
Your established lawn now thrives on a different watering philosophy: deep but infrequent. Aim for 1-1.5 inches of water per week (including any rainfall), but deliver this moisture in just 2-3 deep watering sessions rather than daily light sprinklings. This approach encourages roots to grow deeper as they search for water, creating a more drought-resistant lawn.
“The biggest shift our customers need to make is mental,” says our lawn care expert. “After babysitting their new sod for a month, it feels strange to suddenly water less often. But trust me—your lawn will be much healthier in the long run with deep, infrequent soaking.”
Early morning (5-8 AM) remains the optimal watering time to minimize evaporation and disease risk. This timing allows grass blades to dry quickly during the day, reducing fungal problems that thrive in prolonged moisture.
As the seasons change, so should your watering approach:
Spring: As your lawn awakens, provide about 1 inch weekly in 1-2 sessions. Resume regular watering as the grass greens up and temperatures climb.
Summer: This is peak water demand season. Provide 1-1.5 inches weekly in 2-3 sessions, increasing frequency during heat waves. Watch for signs of drought stress in July and August.
Fall: As temperatures cool, reduce to 1 inch weekly in 1-2 sessions. Continue until growth slows significantly.
Winter: Minimal watering needed, typically only during extended dry periods when the ground isn’t frozen. Your lawn is semi-dormant and requires little moisture.
Water isn’t the only ingredient for long-term lawn success. Complement your watering routine with these essential practices:
Annual core aeration improves water penetration and reduces soil compaction, allowing your irrigation to work more efficiently. Fall overseeding helps maintain a dense turf that uses water efficiently and crowds out weeds.
Your fertilization schedule should support your watering practices: a light feeding in early spring as grass greens up, a major feeding in late spring for summer growth, another significant application in early fall for root development, and a winterizing fertilizer in late fall to prepare for spring green-up.
Mowing height plays a surprising role in water conservation too. Keep your grass at 3-3.5 inches during summer to shade the soil and reduce evaporation. Those extra inches of height can reduce water needs by up to 30%!
“After establishment, we encourage our Malden and Everett customers to think of watering like a good meal—not frequent snacks,” explains our maintenance specialist. “Deep, thorough watering sessions two or three times weekly promote stronger roots and a more resilient lawn than daily sprinklings.”
More info about How to Care for New Sod
Transition Timeline Recap
Let’s recap the journey from fresh installation to established lawn:
Day 1: That crucial deep soak (45-60 minutes) that penetrates 3-6 inches into soil, creating the foundation for success.
Weeks 1-2: The intensive care period with frequent, light watering (2-4 times daily) to maintain consistent moisture in the shallow root zone.
Weeks 3-4: The critical transition to deeper, less frequent watering (every other day) that encourages roots to grow downward.
Month 2: Established lawn care begins with just 2-3 deep waterings per week, totaling 1-1.5 inches.
Months 3+: Your maintenance rhythm now follows seasonal patterns, with continued focus on deep, infrequent irrigation adjusted for weather conditions.
“This transition timeline isn’t just theory—it’s the blueprint we’ve refined over 25 years of installing and maintaining lawns throughout Massachusetts communities,” notes our lawn care manager at Steve’s Services. “The customers who follow it consistently end up with the lawns their neighbors envy.”
Frequently Asked Questions about Watering Fresh Sod
Why does my new sod feel squishy?
Walking across your new lawn should feel firm and springy—not like you’re stepping on a wet sponge. If your sod feels squishy underfoot, you’ve likely been a bit too generous with watering.
This happens more often than you might think, especially in areas like Melrose and Stoneham where clay soils are common. When soil becomes saturated, it creates several problems for your new lawn. The roots actually need oxygen as much as they need water, and waterlogged soil pushes out those vital air pockets. This can literally suffocate your new roots before they have a chance to establish.
That constant moisture also creates the perfect breeding ground for fungal diseases, which can turn your beautiful new lawn into a patchy mess in just days. Perhaps most concerning is that roots simply won’t dive deep into saturated soil, leaving you with a shallow-rooted lawn that won’t stand up to drought later.
The good news? This is easy to fix. Reduce your watering duration by 25-50%, increase the time between sessions, and make sure your lawn has proper drainage. If your soil seems particularly compacted, core aeration might be worth considering, but usually just dialing back the water will do the trick.
“I see this most often when homeowners are nervous about their investment drying out,” our drainage specialist explains. “They think more water means more growth, but roots actually need that cycle of slightly drier conditions to encourage deep growth.”
Can rainfall replace a scheduled watering?
Absolutely! Natural rainfall is actually better for your lawn than irrigation water—it’s perfectly pH balanced and contains trace nutrients that help your grass thrive. The trick is knowing when to skip your scheduled watering and when to supplement.
The easiest way to make this call is with a simple rain gauge placed in an open area of your yard. After each rainfall, check how much you’ve received. As a general rule, half an inch of rain equals one typical watering session. If Mother Nature delivers more than that, you can happily skip your next scheduled watering, saving water and giving yourself a break.
For lighter rainfall (less than ¼ inch), go ahead with your regular watering but cut the duration short. This prevents both wasting water and overwatering your new sod.
Many of our Winchester and Burlington customers have taken the guesswork out of this equation by installing smart irrigation controllers with rain sensors. These clever devices automatically adjust your watering schedule based on local rainfall, typically saving 30-50% on water while keeping lawns healthier.
“The best part about these systems,” our irrigation specialist shares, “is that they work while you’re on vacation or just too busy to monitor rainfall yourself. The lawn gets exactly what it needs, no more and no less.”
When can kids & pets play on the lawn?
This might be the question we hear most often, especially from our customers with families in Danvers and Reading. Everyone’s excited about that beautiful new green space and eager to enjoy it!
The short answer is that most lawns need about four weeks before resuming normal activity. During the first two weeks, it’s best to keep everyone off the lawn completely if possible. Those fragile new roots are just beginning to venture into the soil below, and even light traffic can disrupt their progress.
During weeks three and four, you can allow very light, limited traffic—think careful walking rather than running, playing, or any concentrated activity. After the four-week mark, you can gradually resume normal use if your lawn passes two simple tests:
First, try the root tug test. Gently grasp a small section of grass blades and pull upward with light pressure. If you feel significant resistance, the roots have established well. If the sod lifts easily, give it more time.
Second, do a soil firmness check by walking across different areas of your lawn. If your footprints are minimal and the ground feels solid underfoot, you’re good to go. If your feet sink in or leave deep impressions, it’s best to limit traffic for another week or two.
“For pet owners in Lynnfield and North Reading, we recommend keeping dogs on a leash for bathroom breaks during the first month,” our turf specialist advises. “This prevents them from creating paths or favorite spots that might develop differently from the rest of the lawn.”
With a little patience during these first few weeks, you’ll soon have a resilient lawn that can handle all the family fun you can throw at it!
Conclusion & Next Steps
You’ve made it through our comprehensive new sod watering guide! Taking proper care of your new lawn during these critical first weeks isn’t just about protecting your investment—it’s about creating that gorgeous green space where memories will be made for years to come.
Think of your watering journey as chapters in your lawn’s life story:
First, there’s the crucial “welcome home” deep soak in those initial 24 hours, where you’re helping your sod overcome the shock of transplant and encouraging those first tentative roots to reach into their new soil home.
Then comes the nurturing period of weeks 1-2, with those frequent, lighter waterings that keep your young lawn consistently hydrated while it finds its footing.
As your sod matures through weeks 3-4, you’ll transition to deeper, less frequent watering sessions—essentially teaching your lawn’s root system to grow downward in search of moisture, building resilience for the future.
Finally, once established, your lawn will thrive with those deep, infrequent soakings that maintain health while conserving water.
Your lawn is as unique as your home itself. The guidelines we’ve shared provide an excellent foundation, but the real magic happens when you tune into your lawn’s specific needs based on your soil, sun exposure, grass type, and our sometimes unpredictable Massachusetts weather patterns.
Here at Steve’s Services, we’ve spent over 25 years helping homeowners throughout Everett, Medford, Malden and surrounding communities create and maintain lawns that become the envy of the neighborhood. Our team understands the unique challenges that New England lawns face—from summer heat waves to those occasional drought restrictions.
We see our relationship with your lawn as a partnership. Whether you’re at the beginning of your sod journey or looking to improve your established lawn, our team is ready with personalized guidance and professional service. From initial sod installation to ongoing maintenance programs, irrigation solutions, and seasonal care, we’ve got you covered.
The pride we feel when driving past a lush, thriving lawn we helped establish never gets old. There’s something deeply satisfying about changing a property and knowing families will enjoy that space for years to come.
Ready to take your lawn to the next level? Visit our website or give us a call to schedule a consultation. We proudly serve communities throughout Massachusetts, including Burlington, Danvers, Everett, Lynnfield, Medford, Melrose, North Reading, Reading, Revere, Saugus, Stoneham, Winchester, Woburn, Malden, and Wakefield.
More info about caring for new sod
With a little patience and the right care during these first critical weeks, your new sod will reward you with a resilient, beautiful lawn that improves your home for seasons to come. Happy watering, and here’s to your lawn success story!
